|
Shane's R2 Build Log
|
|
|
Shane's R2 Build Log
|
Mounting the Center Wheel AssemblyThe wheel assembly by itself doesn't really fit well inside of the foot shell. The wheel bracket is 5.25" long, which is too long to actually connect to anything inside of the foot shell. Not to mention, even if it could attach to something, clearance between the foot shell and the floor would be a problem. So, there needs to be something between the foot shell and the wheel assembly. Hence the piece of 1.25" square aluminum. 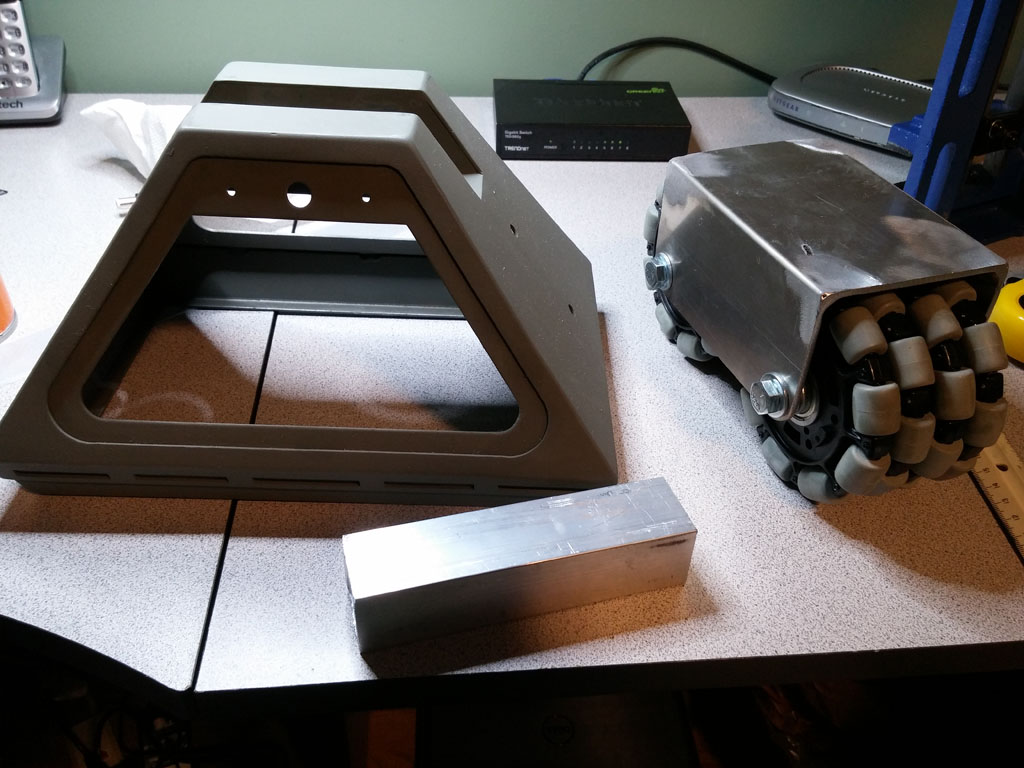 Attaching the 1.25" Spacer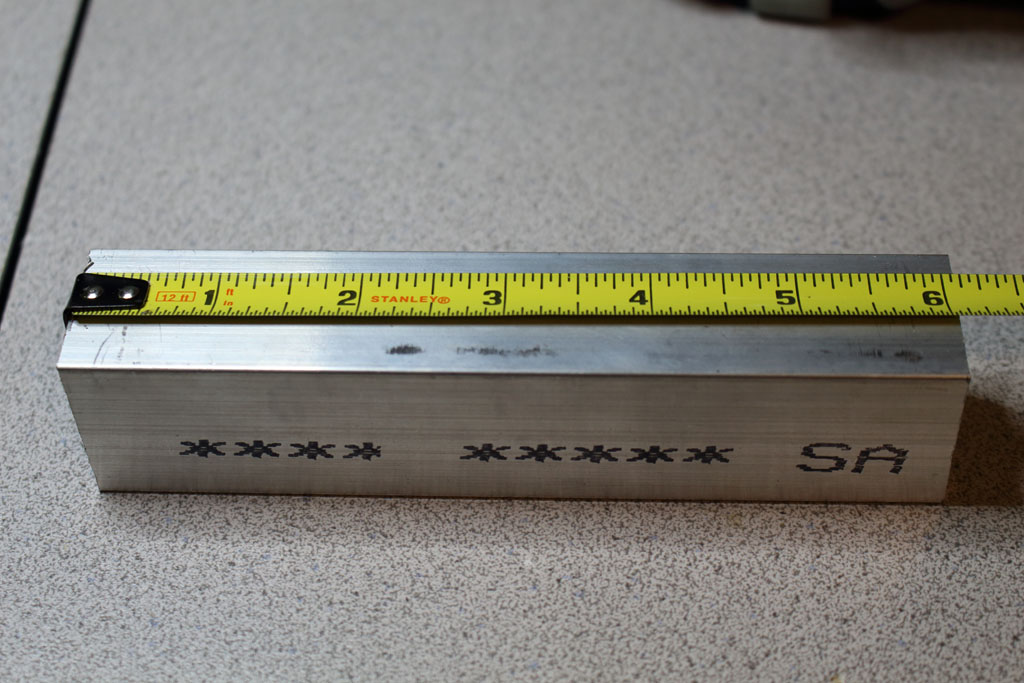 The piece of aluminum that I received with my wheel assembly was too long. Before I could do anything else, I needed to cut it down to size. I measured off 5.25", pulled out my trusty handsaw, and went to town. 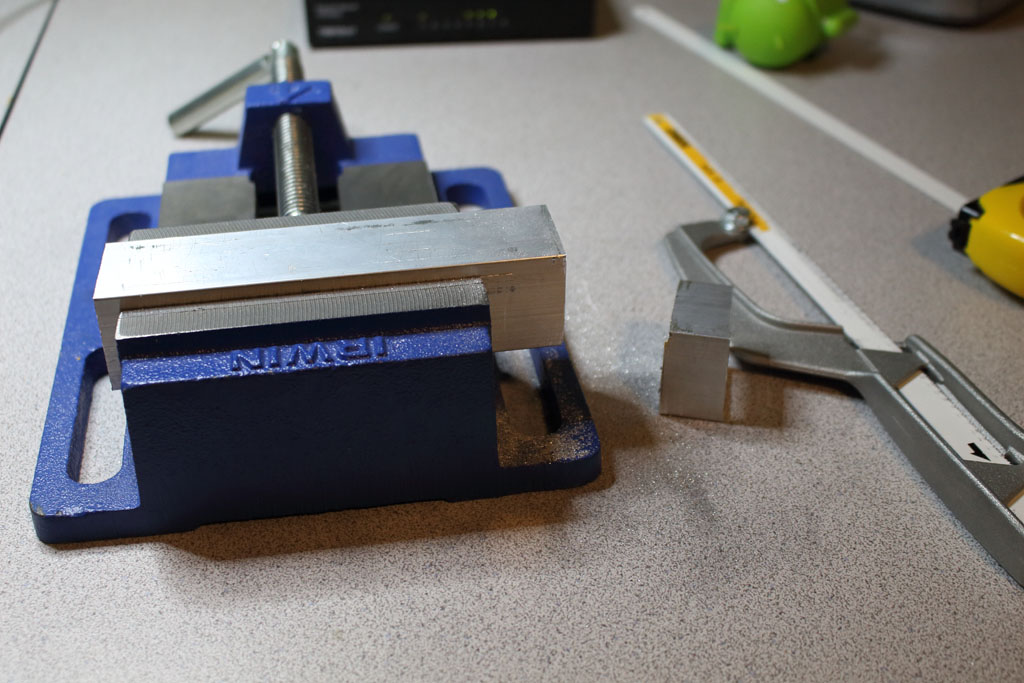 The next thing I needed to do was attach the aluminum spacer to the wheel bracket. This meant drilling holes not only in the spacer, but the wheel bracket too. And this meant I had to disassemble the wheel assembly to do so. 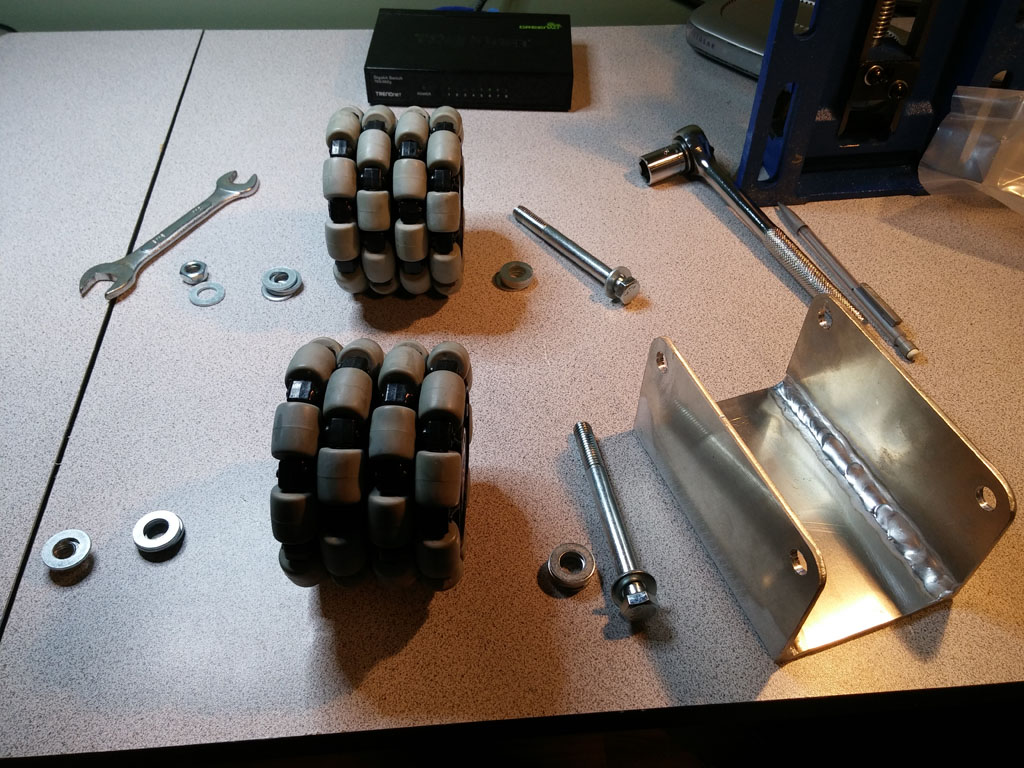 I measured off 1.5" from each end of the bracket and drilled two 5/16 holes on center. The aluminum bar needed to sit flush with the bottom of the foot shell's U-channel. So that ruled out having a bolt head or nut on that side of the square bar. Taking a cue from club member George Ford, I decided to drill and tap matching holes accepting 5/16-18 bolts on the bracket side of the bar. 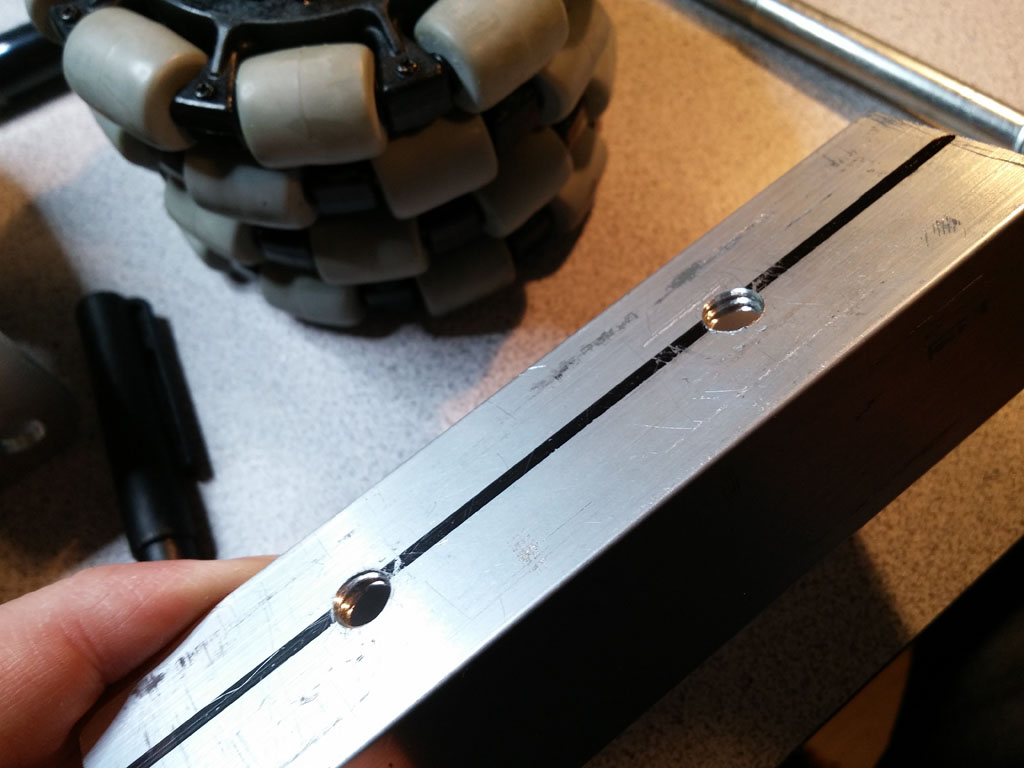 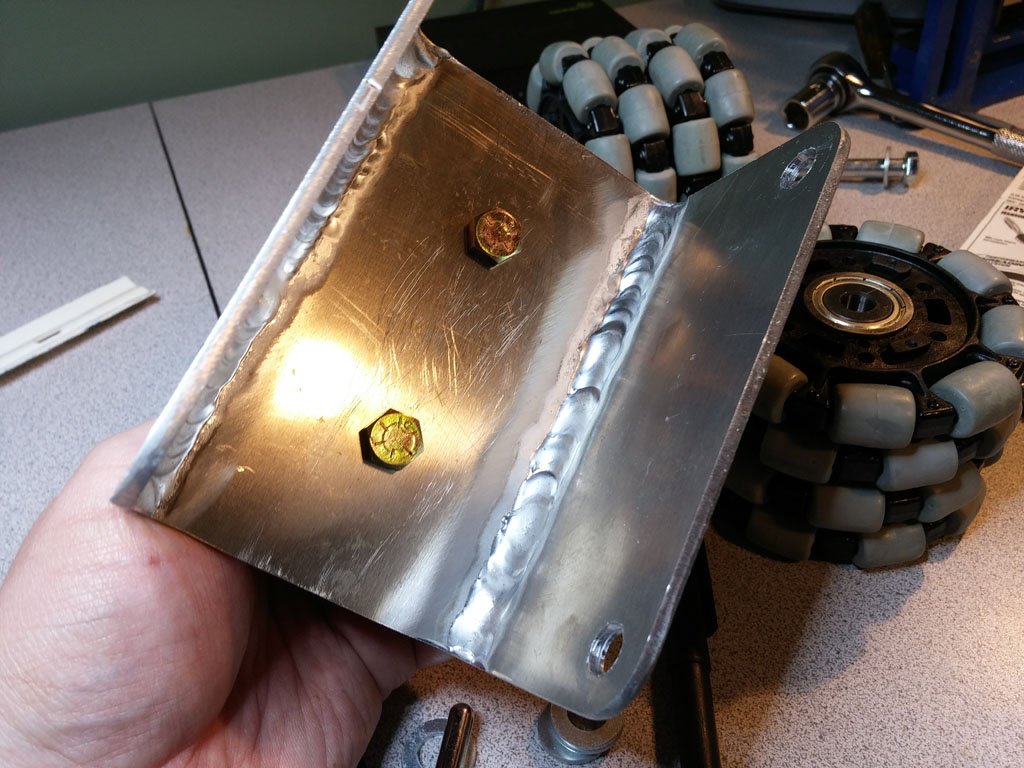 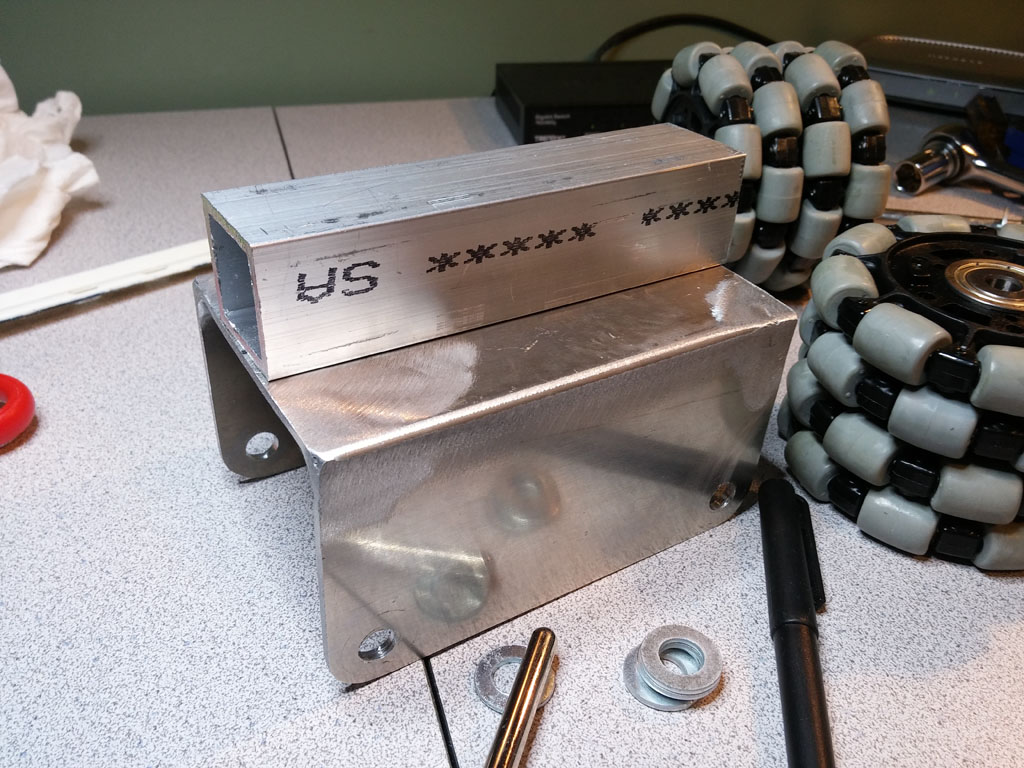 I attached the aluminum bar using 5/16-18 1" bolts. Once R2 gets closer to venturing out into the real world, I may revisit these bolts to apply some Loctite. Attaching To The Foot ShellI basically had two options for attaching the front wheel assembly to the front foot shell. One option is to drill a couple of holes into the foot's center U-channel and bolt the assembly/spacer combo directly to the foot shell. There aren't standard locations for these holes. For example, club member Timothy Drake separated his bolts by 3.5". George Ford used four bolts, two 1.5" from the front and two 1.25" from the back. I almost went down this road. But I decided not to for two reasons. 1) I didn't like the idea of having the heads of bolts exposed on the feet. 2) I REALLY didn't want to butcher my very expensive foot shells with more holes. I should mention that there are advantages to this approach. It's super easy to detach the wheel assembly. And perhaps the biggest advantage is that attaching the side panels to the feet are super simple as there isn't a wheel assembly in your way. In the approach that I chose, getting side panels on can prove to be a challenge. The option I chose is to use a mounting bracket of sorts that slides up and over the underside of the U-channel and connects to the shell with the same bolt used to connect the ankle. Being the less-destructive option, this is the direction that appealed to me most. But it also meant I needed to fabricate a mounting bracket. Using some measurements I took inside of the foot shell, I drew a cutting/drilling template for the footshell bracket in Adobe Illustrator. 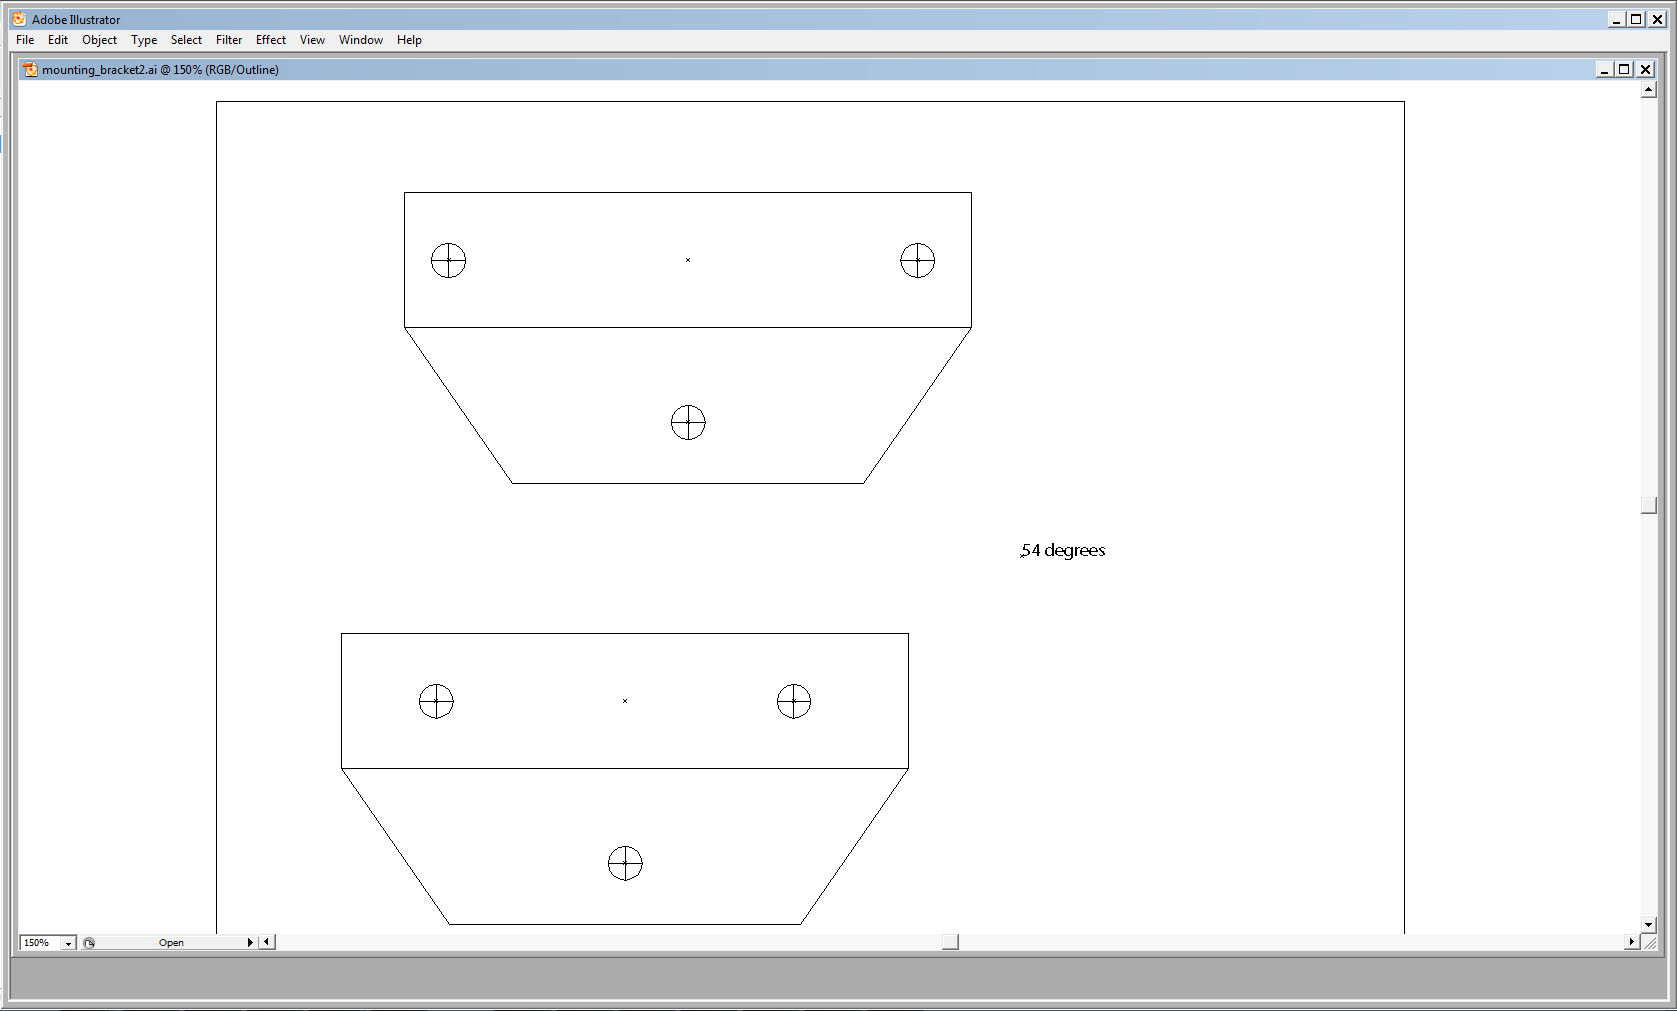 I added 5/16 hole locations for both the ankle bolt as well as the sides of the square aluminum stock. My plan was to tap 5/16-18 holes in the sides of the aluminum stock and attach the brackets using 1" 5/16-18 bolts. Because of this, I needed to have the tapped holes positioned differently on the sides to allow the bolts space within the stock. This meant that the brackets also needed 5/16 holes placed different as well. In retrospect, I probably should have just drilled out two identical sets of side holes, skipped the tapping, and used longer bolts with nuts/washers. But, alas, hindsight. On one side of the aluminum stock, I drilled/tapped 5/16-18 holes 1/2" from either end. On the other side of the aluminum stick, I drilled/tapped 5/16-18 holes 1" from either end. 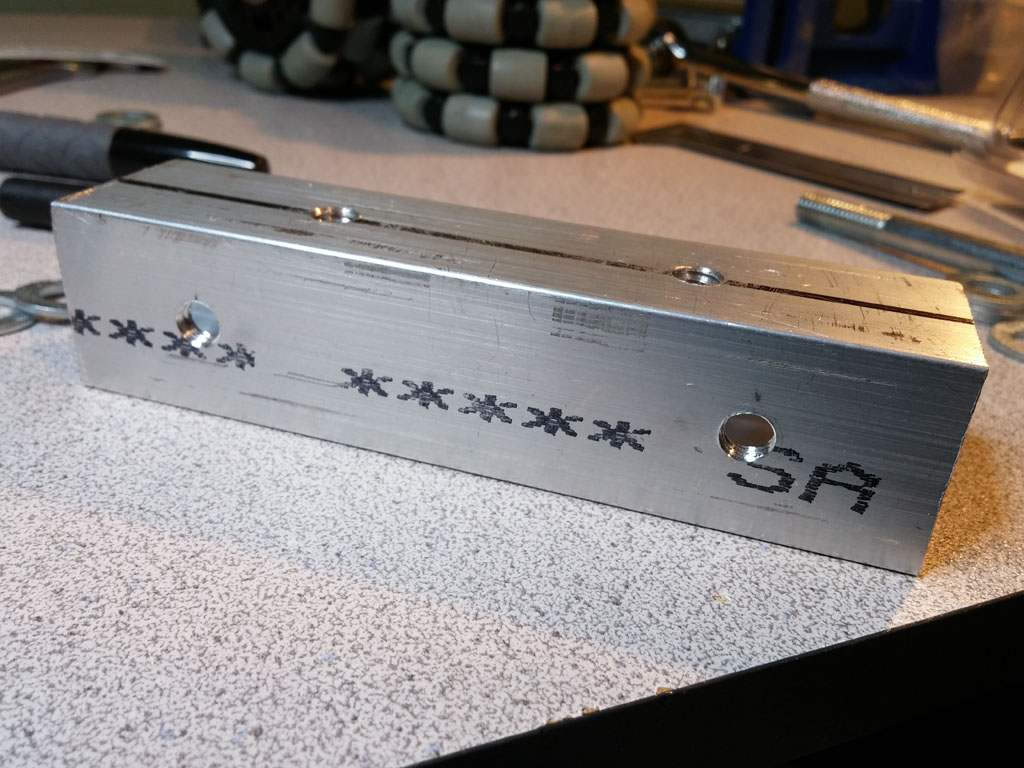 For the brackets, I bought a thin sheet of steel from Home Depot. I printed and cut out my bracket templates and affixed them to the steel using some spray adhesive from 3M. I cut the brackets out of the steel using a jigsaw. 
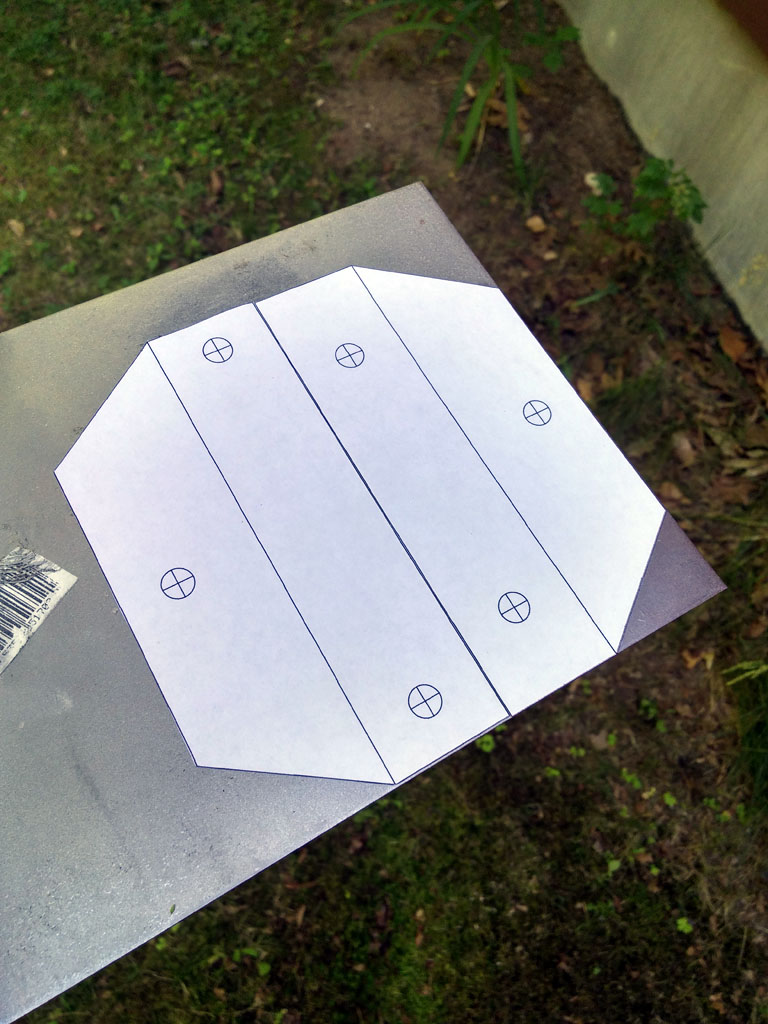 I then drilled out all of the 5/16 holes, filed down all the rough edges, removed cutting template with some Goo Gone, and cleaned everything up.  I reassembled the wheel assembly for a test fit, and then attached the brackets to the foot shell using the ankle bolts, which meant attaching the ankle. I then slid the wheel assembly into place and hand-tightened all of the bolts.  Because the bracket I fabricated is steel, it will rust. After I was satisfied that everything looked ok, I disassembled it all and sprayed the foot shell brackets with the same self-etching primer I used on the foot shells. No more rust (hopefully). I then reasssembled everything and tightened up all the bolts. The foot is ready for action! |