Push Mowers and Hydrolocking

I topped off the lawn mower’s gas tank, pushed it to the edge of the lawn, and then took a minute to admire what was left of the beautiful, yet hostile, dandelion invasion occupying a tract of land that used to pass for my lawn. “Sorry, fellas. But you’ve got to go.” I reached down and hit the primer bulb on the side of the engine. And then, holding my breath, I grabbed the handle on the starter rope and gave the thing a very enthusiastic tug.

THUNK!

The starter rope stopped short and sent pain shooting straight up my arm. And of course this was followed by a gratuitous, and perhaps somewhat humorous, tirade of cursing and jumping around. “What the #$*&! happened?” After I got over myself, I shyly gave the starter rope a few more tugs just to confirm what I already knew. Something was flubbed up.

I immediately checked the oil. When I was too young to really understand such things, my parents (and step-parent) ingrained into me the notion that oil was the key to all things motorized. Hear a weird knocking noise? Check the oil. Low on windshield wiper fluid? Check the oil. Flat tire? Check the oil. I believe the mantra was something along the lines of, “In the beginning man invented motor oil. After that, he invented the motor.” So I checked the oil. And it was low. But not THAT low.

I then tilted the mower up to look beneath it. “Perhaps something jammed the blade up,” I thought. Nope. That wasn’t it. But that’s when I noticed oil pouring out of the exhaust. “Hmmm…I don’t think that’s supposed to happen.” And then oil started seeping out of a couple of other places. It was bleeding everywhere! I removed the air filter and noticed there was oil mixed in with the gas inside the fuel intake as well. The prognosis didn’t look good. And It took me 15 minutes of tinkering with things before I finally admitted defeat and came inside to consult the interwebs.

Apparently what I had was a case of hydrolock. You mechanical types surely know what that is. But I’m not a mechanical type. So this was a completely new concept for me. Hydrolock occurs when a fluid enters the cylinder head. In my case, it was oil. But it can happen with water if you’re prone to driving your vehicle through creeks and such. Fluids don’t compress like a gas. So your piston can’t move in the direction that would ordinarily result in compression. And the piston can’t move in the other direction because of the vacuum that exists in the cylinder head. So it becomes stuck. And if this happens while things are in motion, it can lead to some very serious engine damage.

After I had wrapped my head around the problem, I went back outside and attempted to get things moving again. I disconnected and removed the spark plug. And then I tilted the mower up and let all of the oil drain out of the cylinder head. I replaced the spark plug, topped off the oil, and then changed the air filter because it was looking kind of rough. After that, the starter rope moved freely.

It took a little effort to get the mower to start. I’d prime it and start it only to watch it immediately die while I choked on a cloud of white smoke. But after some persistence and a lot more smoke, the mower finally stabilized. Once it could keep itself running, I let it idle for a while so that it could burn off any excess oil that was still hanging out in the cylinder head.

Eventually the mower seemed to behave normally and I managed to get the rest of the yard mowed. But I’m still puzzled as to how this whole thing happened to begin with. The scenario suggested by people smarter than me involves tipping or tilting the mower during storage. But the mower had been sitting on flat ground since I had used it the previous evening (without any issues, mind you). And I used it the following day without incident after having stored it the same way. So it’s a mystery to me. Maybe you mechanical types have some theories.

Upgrading a 2001 Jeep Wrangler Stereo

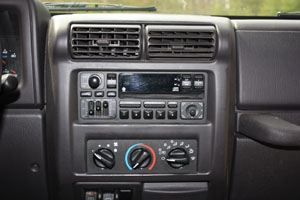
My Wrangler had been in need of a new stereo for a long time. The stock stereo gave up playing CDs years ago. And since it didn’t have an AUX port, I was forced to listen to the radio or nothing at all. I had tried using a cheap FM transmitter in conjunction with my MP3 player. But the sound quality from those transmitters are just awful and they’re a little awkward to use most of the time. So I gave up trying to make due with what I had. It was time for an upgrade.

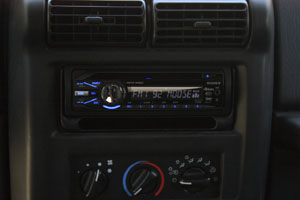
My criteria for selecting a new stereo receiver were as follows: It must be cheap. It must have an AUX port. And it must have positive customer reviews. That’s it. I ended up purchasing a Sony CDX-GT340 from Quadratec. For the price, it’s really not a bad stereo receiver. It feels a little cheap. But in addition to the AUX port, it supports CD-Rs loaded up MP3s and WMA files and RDS data transmitted from radio stations – two things I’ve never had before and are both very cool. I’ve had it installed well over a month now with no problems. If you’re on a budget, the CDX-GT340 is definitely worth a look.

I’m going to attempt to describe the process for installing a new stereo receiver in a 2001 Jeep Wrangler. It’s not really all that difficult. The entire installation took me somewhere in the neighborhood of 2 1/2 hours to complete – mostly because I took breaks to eat and consult the Internet. You can probably do the whole thing in less than an hour if you’re ambitious and you know what you’re doing…in even less time if you’ve already eaten lunch.

I should insert a disclaimer here – I make no promises that this process will be the same for all TJ Wranglers. I’m not an expert. I know nothing about other TJ stereo configurations. So follow along at your own risk. If you make smoke, please don’t blame me.

There are two things you need to do before you start ripping apart your dashboard.

First, make sure there aren’t any CDs still in your old stereo. It may seem ridiculously obvious. But I made this mistake. Imagine my dismay when, three days later, I realized my copy of Pearl Jam’s “Vs.” was still in the old stereo. *sigh*

Second, you need to disconnect the negative terminal of the battery. This is the most boring part of the job. But it must be done to prevent you from accidentally damaging something or somebody. You only need to disconnect the negative terminal. DO NOT disconnect the positive terminal if the negative terminal is still connected. Many of the car’s electrical devices ground themselves by connecting to the car’s frame, which is connected to the negative terminal on the battery. If you attempt to disconnect the positive terminal while the negative terminal is still connected, you risk creating a short circuit by touching something you shouldn’t. A short circuit will result in fireworks and, depending on what you’re touching, it can also result in an extremely serious shock.

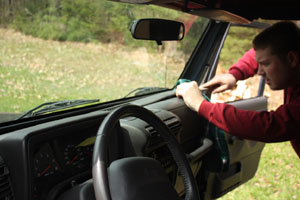
With the battery disconnected, you can now begin to remove the plastic cover that surrounds the stereo and heater controls. Along the top of the dashboard is a long plastic piece that surrounds the defroster vents and the VIN number. You’ll need to remove this piece first because it’s hiding screws that anchor the cover to the rest of the dashboard. Using a flat edged tool, you can pry this piece up. Just be careful not to scratch anything. I used a wide, flat-head screwdriver wrapped in a dishtowel to do this. Start at one edge and then work your way down to the other end.

After you remove the top piece, you’ll see two of the three screws that anchor the plastic cover to the rest of the dashboard. The third screw is actually in the ashtray. Remove the ashtray by depressing the little tab and slide it out. You can use a Phillips head screwdriver or a 1/4” socket to get these screws out.

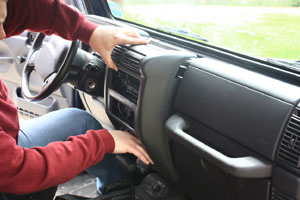
After the screws have been removed, grip the cover near the ashtray and along the top and begin rocking it out of place. With a couple of gentle tugs, it should pop right out.

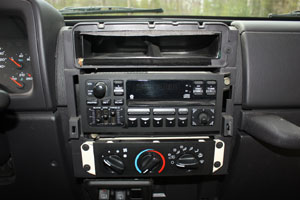
Next comes the hard part. With the cover out of the way, you’ll see two screws that attach the stereo to the dashboard. These screws are actually two of three. The third is on the back of the stereo anchoring it to the firewall by means of a Y-shaped bracket. This screw is extremely awkward to get to. And even with hand access, you’ll find it difficult to get to with your wrench. This is the part that took up most of my time.

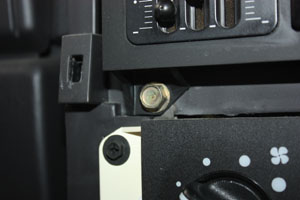
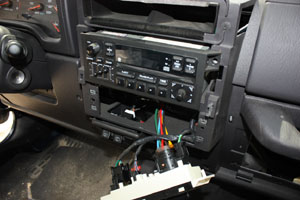
Go ahead and remove the two screws on the front of the stereo. A 3/8” socket will do the trick. Then remove the glove compartment cover and the heater-A/C instrument panel. You need to remove these so you can get your hands behind the stereo. The glove box can be removed by disconnecting the nylon strip that’s attached to it and the heater-A/C instrument panel is only attached by the four Phillips head screws you see in the photo.

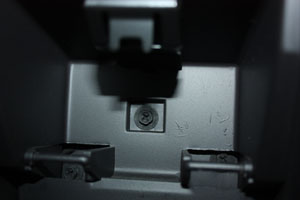
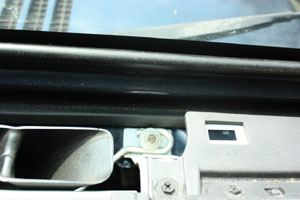
Next, unbolt the Y-bracket from the firewall. The Y-bracket is attached to the firewall by two bolts that sit next to the windshield.

With the Y-bracket detached, you can scoot the stereo out just enough to get your wrench in behind it and remove that troublesome screw. Note that the ground wire for the stereo is also attached to this screw. Expect it to get in your way.

With this last screw out of the way, you should be able to slide the stereo completely out and disconnect all the wiring connectors. But do this carefully. The antenna connector is a bit more delicate than the others. It’s easy to damage if you pull the stereo out too forcefully.

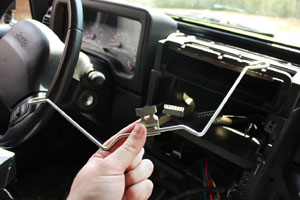
The next thing I did was to remove the Y-bracket completely. I have no idea what this thing is for. I came across a couple of online forum posts that suggested it’s meant to be an anti-theft device. But I’m not entirely convinced of this. The stock stereo is fairly big and heavy. My guess is the Y-bracket is meant for support more than anything else. But, of course, that’s just a guess. If anyone knows what it’s really for, let me know. In the end I didn’t think it was worth the headache to try to reattach it. So I left it out. However, I did attach the Y-bracket screws to the firewall so I wouldn’t lose them.

For me, the next step was the easiest part of all. The CDX-GT340 came with a 2001 Wrangler wiring kit. There was no wire cutting or splicing necessary. The existing connectors just worked. I plugged everything in, reconnected the battery, and tested that everything still worked ok.

After you finish testing the stereo, disconnect the battery again just to be safe. Using the kit supplied to you by the retailer, finish mounting the stereo in the dash. Reattach the heater-A/C instrument panel and glove compartment. And then gently slide the instrument panel surround cover back into place and secure it with the three screws that were holding it in place. Pop the ashtray back in, reattach the plastic defroster vent cover, reconnect the negative battery terminal, and you’re done!