
 When my wife said that for Christmas she wanted a remote starter for her 2013 Honda CRV, I reflexively jumped for joy inside. “Yes! A new project!” Merry Christmas to me! Keep in mind I’m not a car guy. I know squat about them. But I figured it couldn’t be THAT hard. Step 1 – Push button. Step 2 – Car starts. How complicated could the electronics actually be, am I right? Mmmm hmmm.
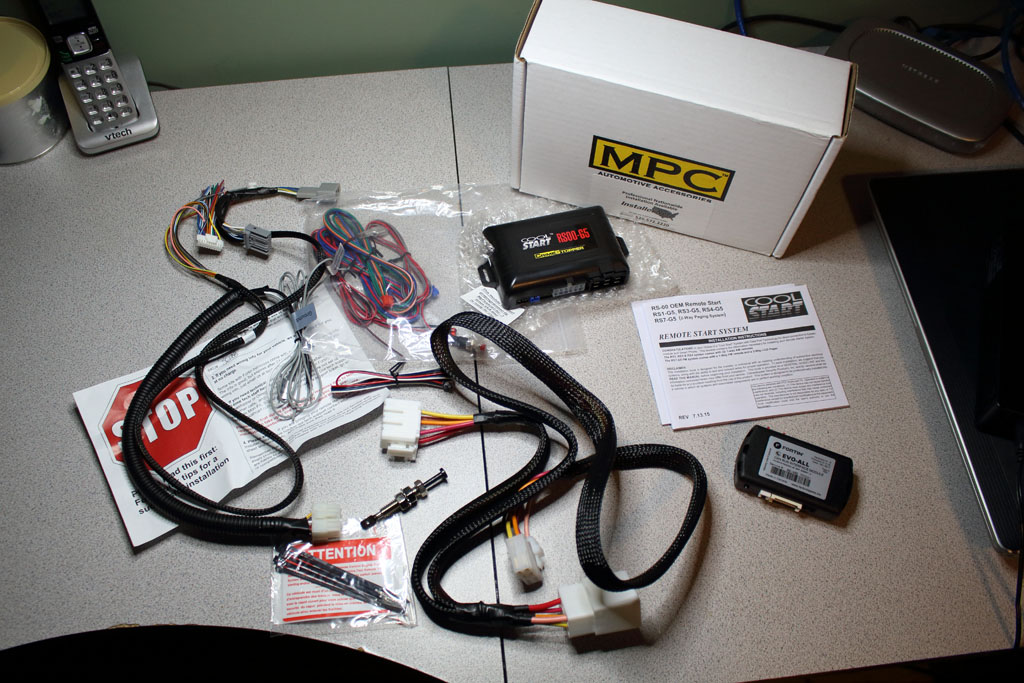
It didn’t take long for me to find a remote starter kit online. The one I purchased cost $189.95 and is made by MyPushCart. The Amazon reviews for MPC remote starters were mostly four and five stars and had mostly comments like “Easy to install!” and “Plug and Play!”
“What do you mean you still have to install it?!”
“It’s -10 degrees outside. Just when are you going to get around to that?”
“Can you even do this kind of thing?”
*sigh*
The Unboxing
Unboxing the kit was pretty intimidating. The first thing I saw was a slip of paper with a big red STOP sign. It looked to contain some useful nuggets of information. Of course, I immediately sat it to the side. Beneath that piece of paper was a whole mess of wires, switches, and boxes. Nestled in the very bottom of the box was a little booklet entitled “Remote Start Kit Installation Instructions.” That booklet contained a bunch of technical jargon and wiring diagrams. Nothing looked plug-and-play. The booklet contained very few pictures. And it certainly contained no step-by-step instructions. Uh oh.
Once I was filled with a sufficient level of “I’m-in-way-over-my-head” anxiety, I revisited the paper with the big STOP sign. It instructed me to visit a website and enter a code. It said that I’d then be able to download a “tip sheet” to help with installation.
It turns out that the tip-sheet is the Rosetta Stone for the whole installation process. It provides step-by-step instructions. It shows pictures of the kinds of existing connectors to look for, the order in which to hook things up, and the steps for programming the hardware to respond to your key fob. You absolutely need this document. It perhaps should have been included in the box. But I guess a downloadable is ok too.
Plug-And-Play?
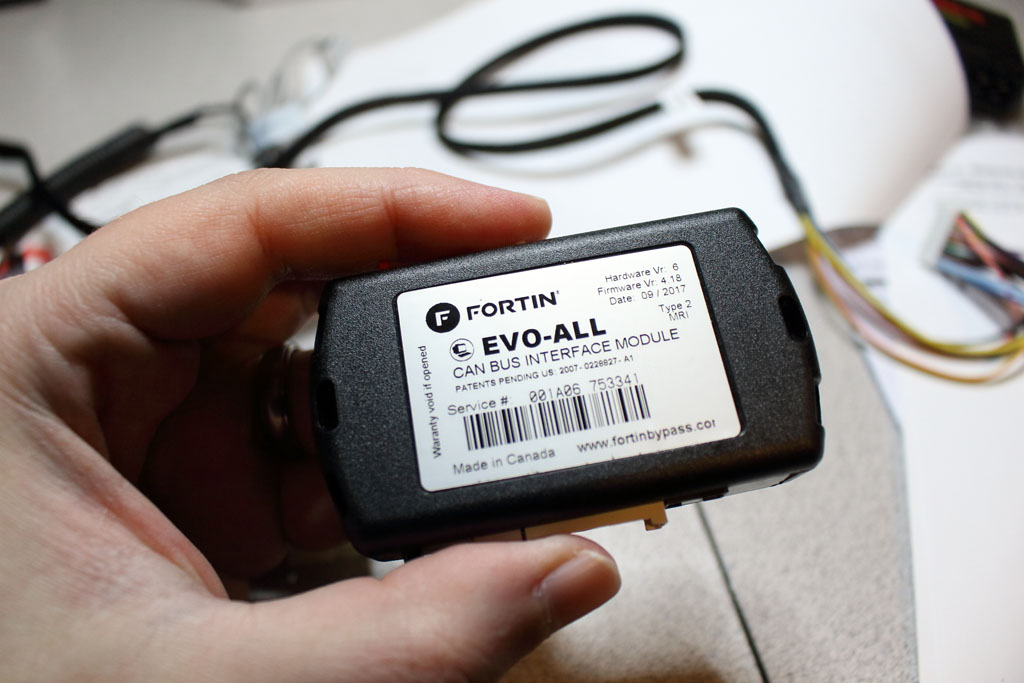
MyPushCart doesn’t actually make most of what’s in the remote starter kit. It sources the electronic components from third party vendors, such as Fortin and CrimeStopper. MyPushCart’s value-add is that they supply wiring harnesses, firmware programming, and tech support that allows an otherwise complicated installation to be more or less plug and play.
Much of the wiring in the box doesn’t actually get used. In my case, I only needed 4 cables, all of which had connectors that fit an existing plug either somewhere in the vehicle or in one of the little included boxes. I suspect the extra wiring is included in these kits simply because it comes with the third party kits. MPC could have thrown it out, but they did the honorable thing and included it. The “Remote Start Kit Installation Instructions” that I previously mentioned was actually from one of those third party kits. It’s not needed at all for a MyPushCart install. Just like the extra wiring, this booklet came along for the ride.
Installation
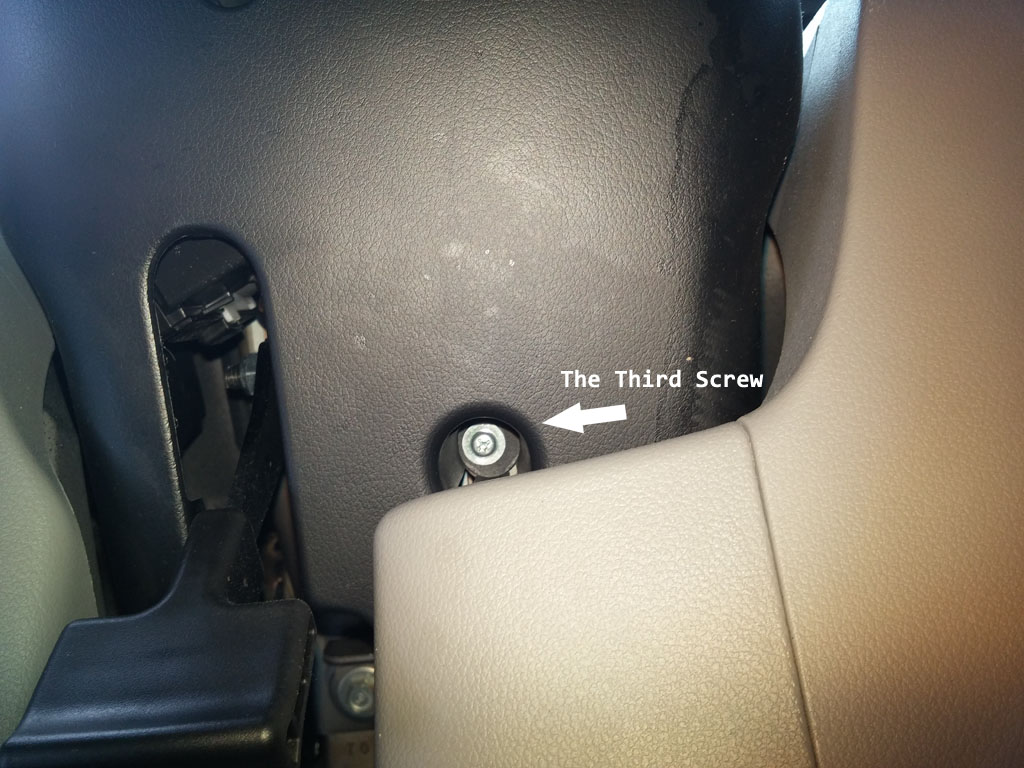
For the 2013 Honda CRV kits, all of the installation occurs beneath the steering column. You have to remove the steering column cover for this. This isn’t difficult. When you turn the steering wheel to one side, you can see a little slot where you can insert a pry-tool, such a flathead screwdriver. If you pry this open, turn the wheel, and then pry the other side open, the top cover will just pop-up and expose Philips-head screws hidden beneath the pry-slots. There’s a third Phillips screw hidden way underneath the steering column. After all three of these screws are removed, the steering column cover should pop right off and expose an extremely neat and wirey mess.


At this point you might be asking yourself two questions – 1) Should I disconnect the battery for rest of this install? And 2) Is there a risk of setting off the airbag?
As for disconnecting the battery, you’ll at least need to be able to turn the steering wheel to remove the cover. Later you’ll need power to sync and test the kit components. But if the idea of leaving the battery connected while you’re disconnecting and reconnecting things makes you uncomfortable, please, by all means disconnect it. You can always reconnect it when you need it. I didn’t bother and everything went ok. But don’t let my blind confidence deter you from doing what makes you comfortable.
What about the airbag? The risk is pretty low so long as you don’t go Dora the Explorer on any wiring the tip-sheet doesn’t talk about. Keep in mind, though, that you are working in the vicinity of the airbag. The airbag’s electronic connections are exposed and accessible once the steering column cover is off. Just be mindful and deliberate about what you do and you should be fine.
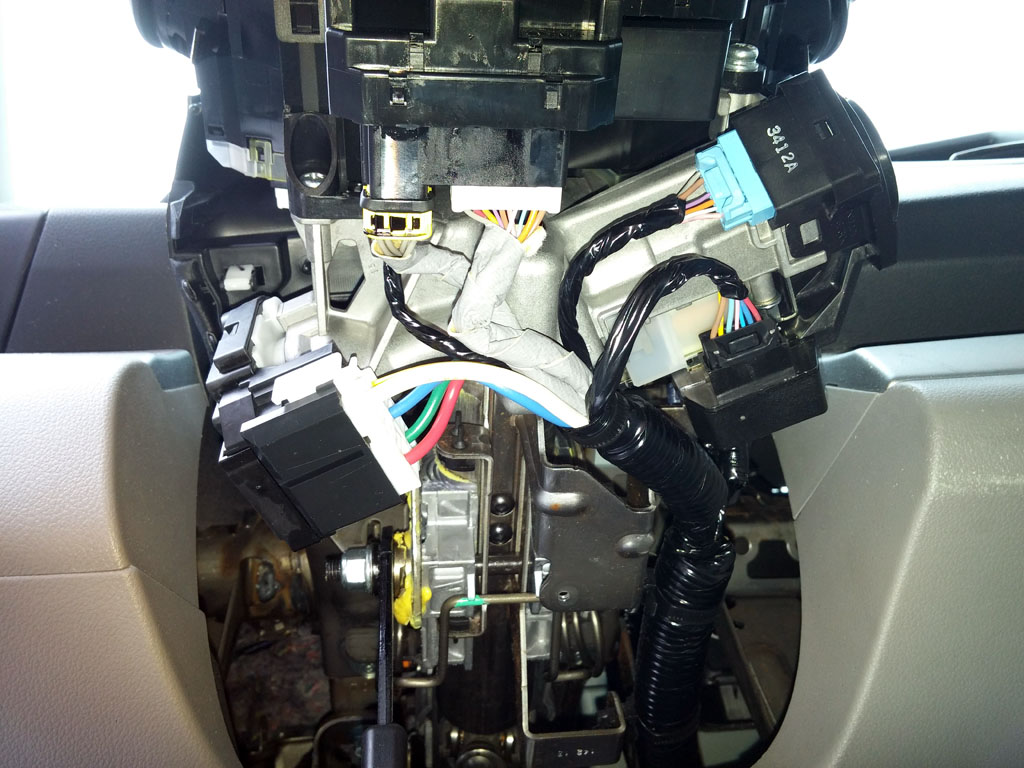
There are only two steering column connections that need to be made. One is for the transponder plug and one is for the ignition plug. The MPC kit includes cables that allow the little remote starter controller boxes from the kit to work as sort of “men-in-the-middle” on these connections.
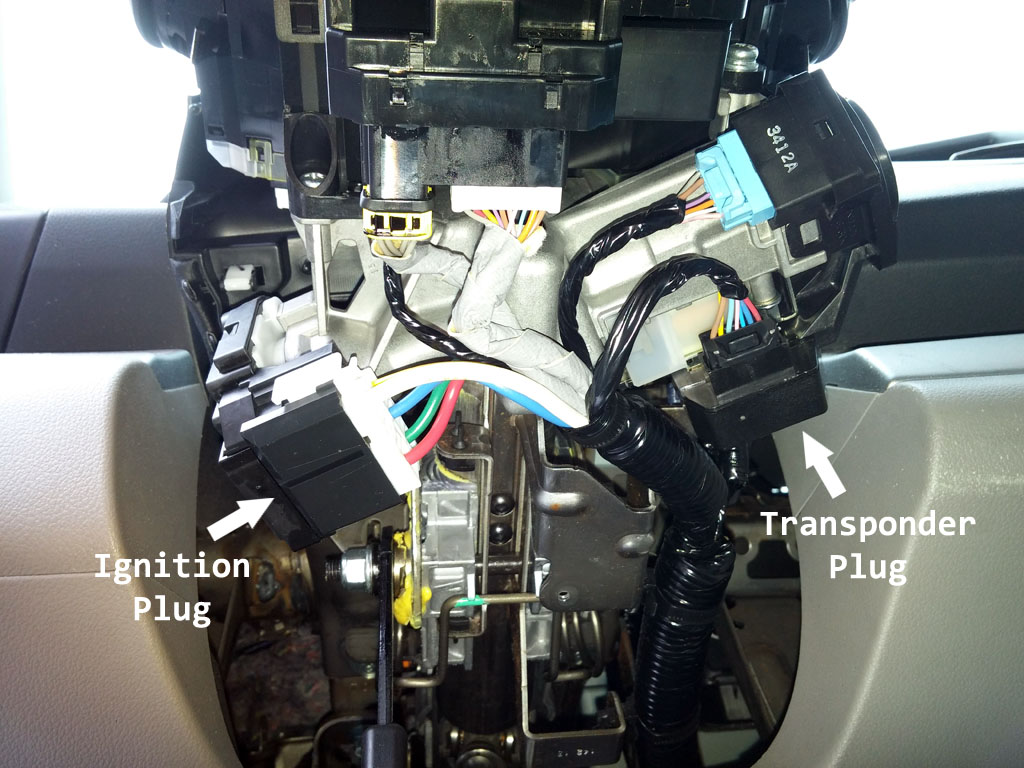
The first connection that needs to be made is the transponder plug. You disconnect the existing transponder plug connection and insert the provided T-harness. The second connection is for the ignition plug. Just as with the transponder plug, you disconnect the existing plug and insert the ignition T-harness in between.
I found the ignition T-harness step to be particularly tricky. The vehicle cabling is wrapped super-tight which made disconnecting the existing connection extremely awkward.
At this point, the tip-sheet tells you to secure the new wiring and replace the steering column cover. My advice is to hold off until you verify that everything works. Also, depending on where you place your remote starter boxes and slack wiring, you might need better access and visibility to the area beneath the steering column than you’d get with the cover on.
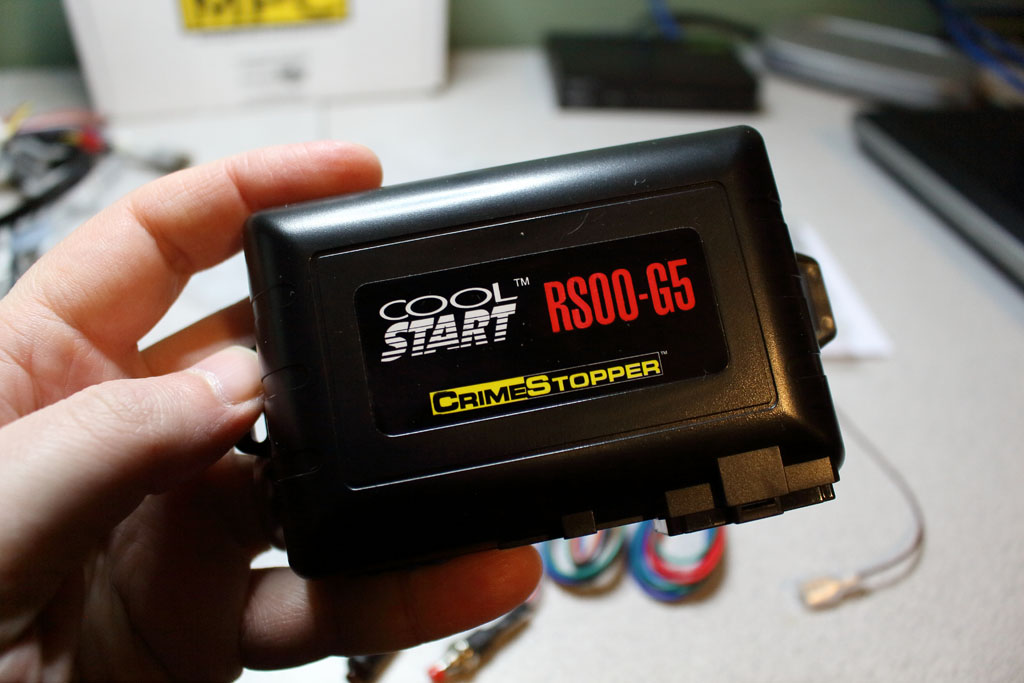
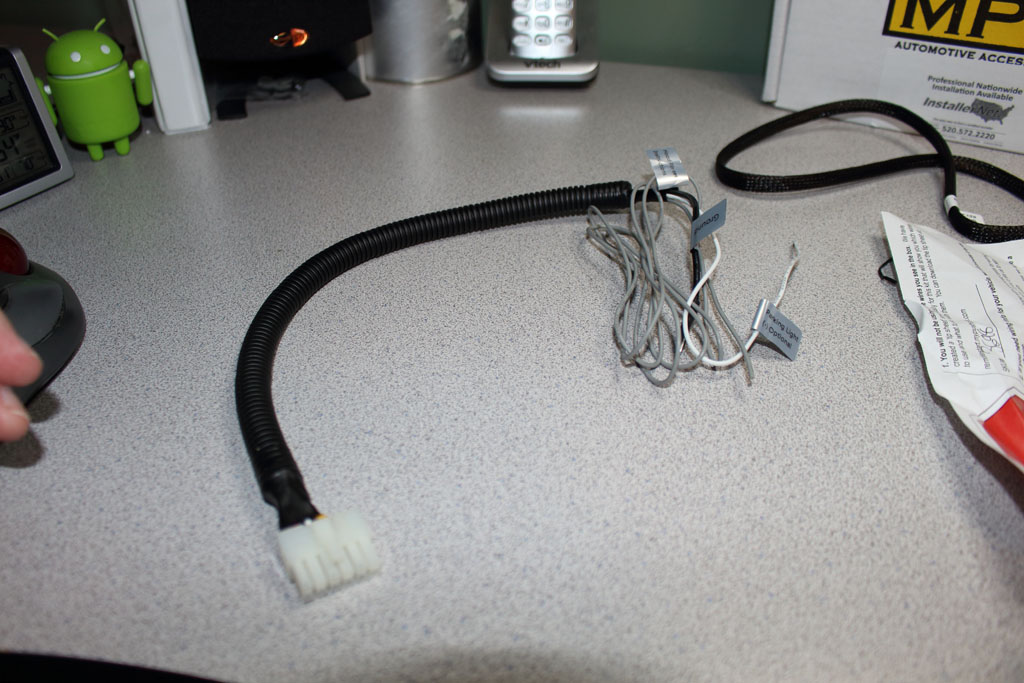
The next thing you have to do is connect one of the kit boxes to ground on the car. This box is the CrimeStopper RS000-G5, referred to as the “RS brain” or sometimes simply as “RS” in the tip-sheet. The cable included for this features a 12-pin connector on the “RS-brain” end and three wires on the other end that are labeled “Parking Lights”, “Ground”, and “Hood Pin”. I have no idea what the “Parking Lights” or “Hood Pin” connections were for. I simply wrapped those wires up with black tape and tucked them away. The “Ground” connection is meant to be attached to a bare-metal spot on the vehicle. It has a little ring-connector that looks designed be screwed down.
I first thought that finding a bare-metal connection point beneath the steering column would be a challenge. But I managed to find an existing screw that had enough slack to accept both the ground connection and a spare nut that I found in my trusty box of “mystery screws and nuts”. Once the ground connection is made, you can plug the 12-pin plug into the RS.

The next step is to sync the electronic boxes and the car together. This simply involves connecting the EVO-ALL and the RS using a single 4-pin wire, plugging in all the T-harness connections to the EVO-ALL, and then performing a series of steps that involve button presses and turning the key in the ignition. It takes less than a couple of minutes. The tip-sheet describes all of this in detail so I won’t duplicate it here.
The tip-sheet also includes instructions for programming the RS. However, my kit included a sticker on the RS that said, “This module has been preprogrammed by MyPushcart for 3 times lock and is ready for use.” As a result, I didn’t actually have to do any of those steps. It looks straightforward though.
From this point, everything just worked. I tested it by simply pushing the lock button on the vehicle remote three-times slowly. The console lit up, and then a couple of seconds later the vehicle started on its own. It’s at this point that I began the process of trying to organize and situate the wiring and controller boxes. This is BY FAR the most difficult and tedious process of the entire thing. The cabling and boxes are bulky to say the least. Finding a spot for everything wasn’t easy. I basically zip-tied and velcroed the whole mess to anything that wasn’t designed to move. It wasn’t pretty. But I kept things out of the way and that’s the most important thing. The biggest challenge is finding a way to position the T-harness plugs so that the steering wheel cover can go back on. The cover doesn’t leave a lot of room for anything extra around the steering column area. So figuring out where things should go involved a lot of trial and error.
Tech Support
I said earlier that one of the value-adds that MPC brings is in tech support. I want to bring some extra attention to this. MPC’s tech support is AWESOME! I only used their email tech support. But I used it a LOT. I peppered them with photos with annotations and lots of questions relating to confusion over connectors, the names of things, a few installation missteps, etc., etc. They ALWAYS responded – if not the same day, usually the next day. Kudos to those guys for being so patient with me.
Conclusion
Do I recommend an MPC remote starter kit? It depends. If you’re a DIY-er, absolutely. If you’re just into the idea of having a remote starter and don’t care about how it gets installed, MPC may still be an option. Maybe you have a tinkerer in your family you could barter with. MPC also has a network of installers that might be an option for you as well, but that’ll be an extra cost.
At the time of this writing, it’s been a few weeks since I installed the MPC kit. My wife has only reported one weird occurrence of the car starting unexpectedly while unlocking and locking the doors. There’s some confusion around the sequence of remote button presses she actually used, so we’re not 100% sure what happened there. We’ve also discovered it can be a little tricky to get the timing of the button presses just right. Too-fast, nothing happens. Too-slow, nothing happens. Get it right, it’s not immediately obvious because the car takes a couple of seconds to start. Practice makes perfect, I suppose.
All in all, this was a fun kit to install. It’s super interesting and I learned a lot. I’m sure you will too.
Do you have a MPC Remote Start for a 2017 Nissan Sentra?
Sorry, Steven. I do not.
I am amazed that this blog has been up 16 months and I get to be the first to comment on it. The hood pin switch is to prevent accidental starting while you are poking around under the hood and the parking lights give you a visual confirmation the car is running, which will also help you to see which is your car in a sea of cars while shopping. Thank you for taking the time for such a great write up! I have installed 3 auto starters on cars past using another company for $70 bucks but, you are on your own for tech support. I looked for that brand first to learn my 2013 Highlander is not available.
I agree that MPC has great support because they brought the kit I needed ‘back online’ as most cars have the chip key and my car does not, and they sent me the link for the correct kit.
My 2014 civic has the chip key and I paid $600 bucks for the install because I was told it needed to be programmed to the computer needing an external programmer. For all I know, they could have used a series of key turns and push buttons, and the ‘external programmer’ was the installer.
Thanks again for the excellent write-up!
Pschoggens
The RS4-G5 is another best remote car starter with trunk release. It comes up with brushed metal 5-button transmitters to operate it of withinft of range. What s more, gives you the included comfort of a full keyless entry system to make getting into your car without being there. Also has a trunk pop so you can open your trunk with the snap of a button from far away.
Is there a remote start for a 2017 Nissan Pathfinder S?
Shane, great write-up. Do you have to restart the car once you get in or just put the key in the ignition to drive?
If you touch the brake before putting the key in, the car will shut off and you’ll have to restart it (I forget this every time I get in my wife’s car). If you put the key first and turn it, the car will remain started.
Yes
If you unlock the car after you started it, does the car turn off? I had a Toyota 4Runner that did this and it was the most annoying thing. All my other’s that had RS would allow me to unlock and enter the car without it turning off.
Jim, it hasn’t turn off for us yet. 🙂
Why does it say you need 2 keys?
Where is the 2-key thing mentioned? I only needed one key for install.
great writeup
Can you tell me a couple of things, I ll be grateful.
Does your factory remote work to unlock the car after remote starting? Or do you have to manually open the locks from the driver door?
Also except for the ground connection, is everything else plug n play or does it still need to splice into some wires?
Yep, the factory key fob works just fine for locking/unlocking/remote starting. I don’t remember having to splice anything myself. It was mostly plug-n-play. Two years later, everything is still working great. 🙂
Hello Shane, this is Mike from MyPushcart. I wanted you to know we have updated the kit and changed the part number to B-3690-252 and the ASIN to B07Q392TR7
Thanks for the great review!
Mike
MyPushcart.com
I just installed mine and wondering how long will the car run for once you activate the autostart?
Very helpful, I just called and received a copy of the installation details for my mechanic/friend to ensure he can help. Lexus GX470. got right through to Sales, after trying Tech Support and not getting through. Very nice person on Sales End, can pay with PayPal and they offer free shipping and Military discount of 15%. I am 95% there, just need to my mechanic’s blessing and happier wife.
How do you reprogram the remote?
My husband installed this for me and it works great, however… the unlock button does not work after I start it. I do have to use the key in the drivers door to gain access to the unlock button. What do we have to do to use the unlock button please. Its on a 2011 equinox
Hi, Dawn! It’s been a long time since I installed this kit. Over 5 years, in fact. So there are some cobwebs in my brain where I kept the details of this install. Also, I suspect the 2011 Equinox kit is a bit different than that of the CRV’s. But I can say with certainty that your unlock button should continue to work as it always has.
I’d start with trying to resync the EVO-ALL device with your car. If that doesn’t work, double check the wiring on the “RS-brain”. Mine had a couple of connections I simply didn’t use. It’s possible the wrong thing is connected to the wrong connector. Short of that, I’d make sure the kit you’re using is the right one for your car. Actually, maybe start with that. 🙂