Part one of this series was devoted to a high level discussion of network storage. I talked about the types of options available, some of their pros/cons, and I outlined some of the things I wanted in a storage solution for myself. In the end, the whole article turned out to be one long-winded argument for a roll-your-own NAS solution.
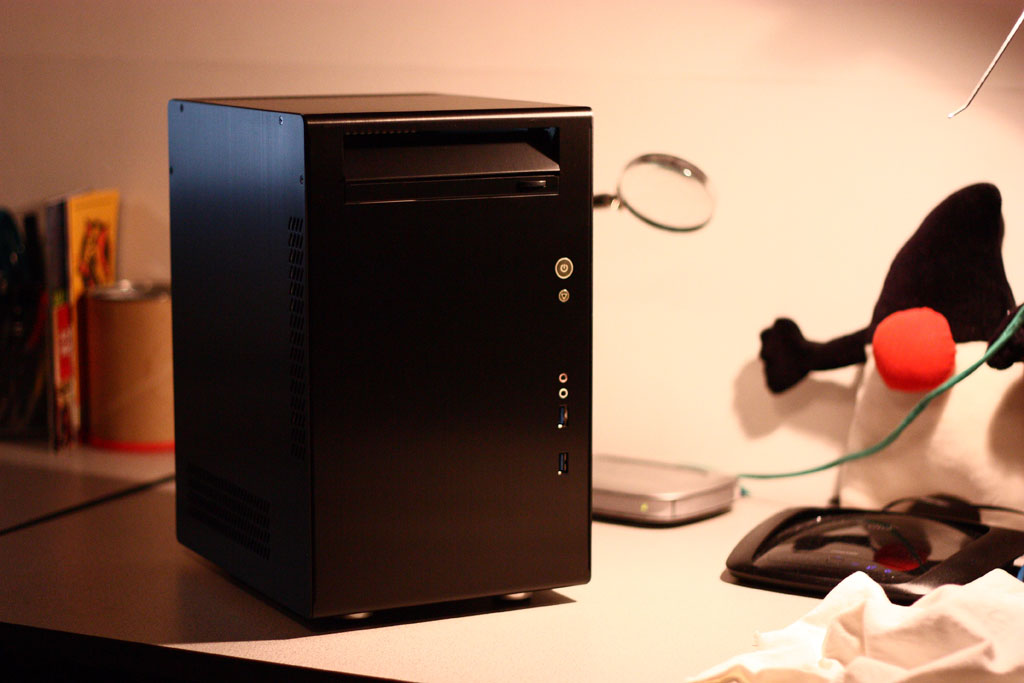
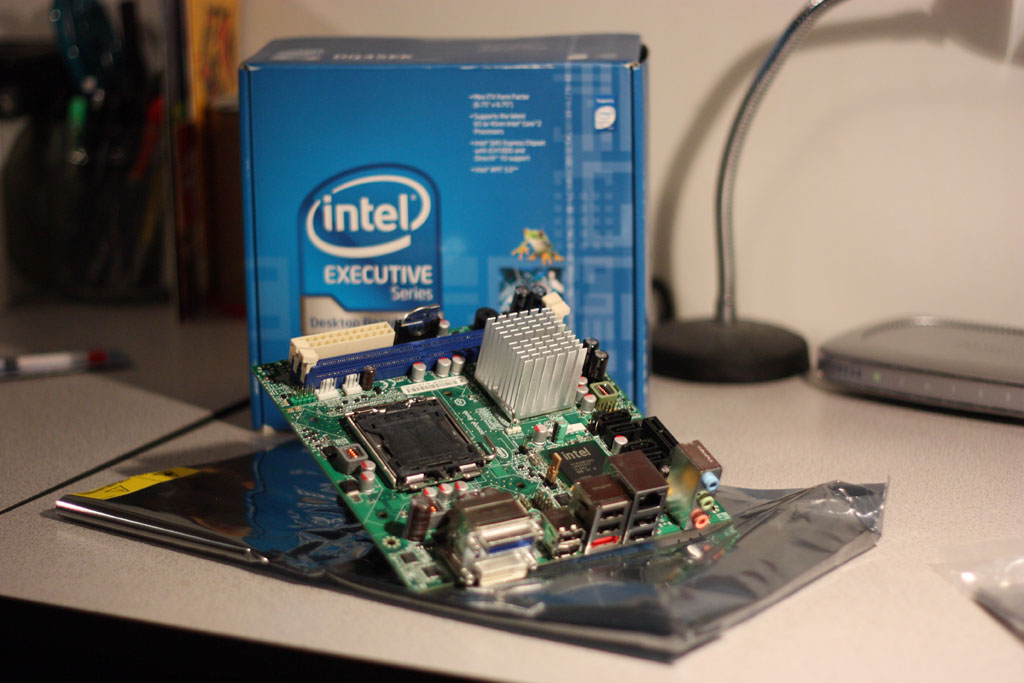
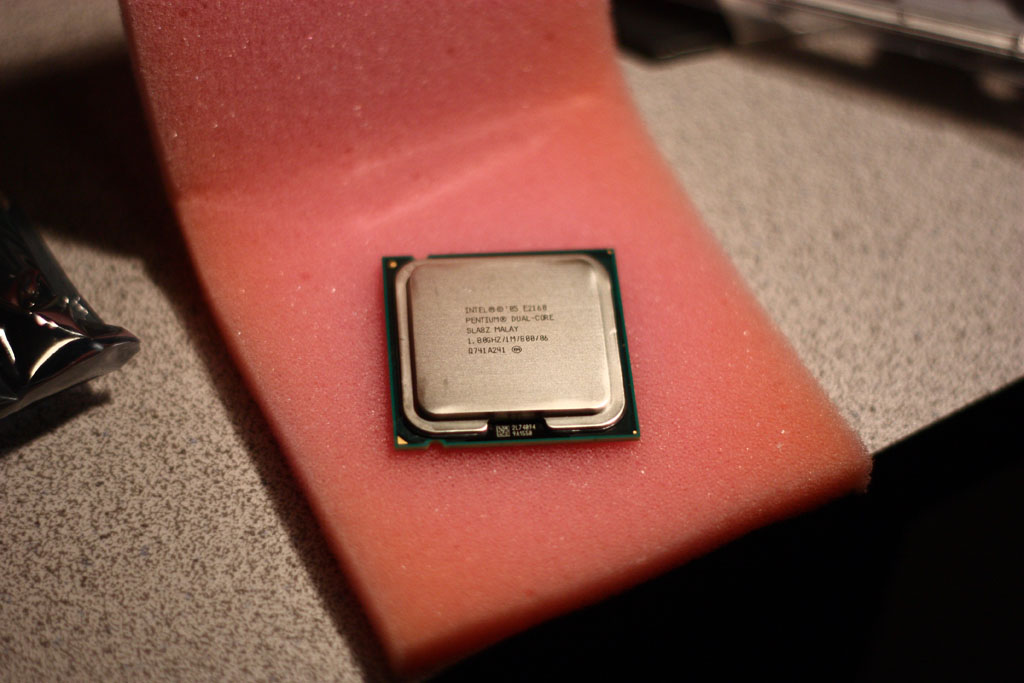
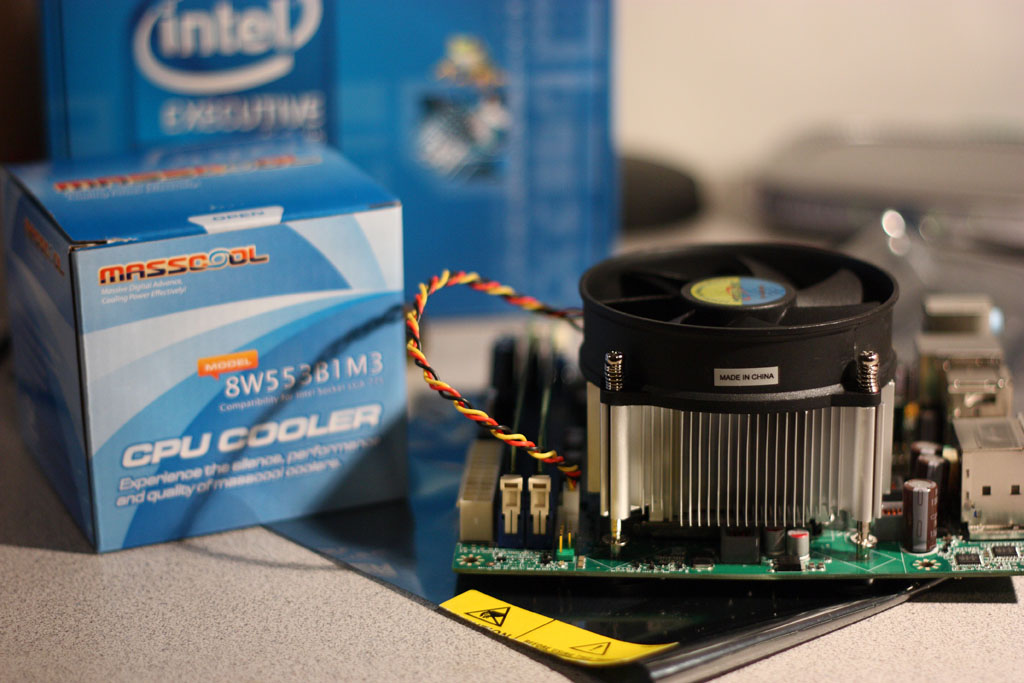
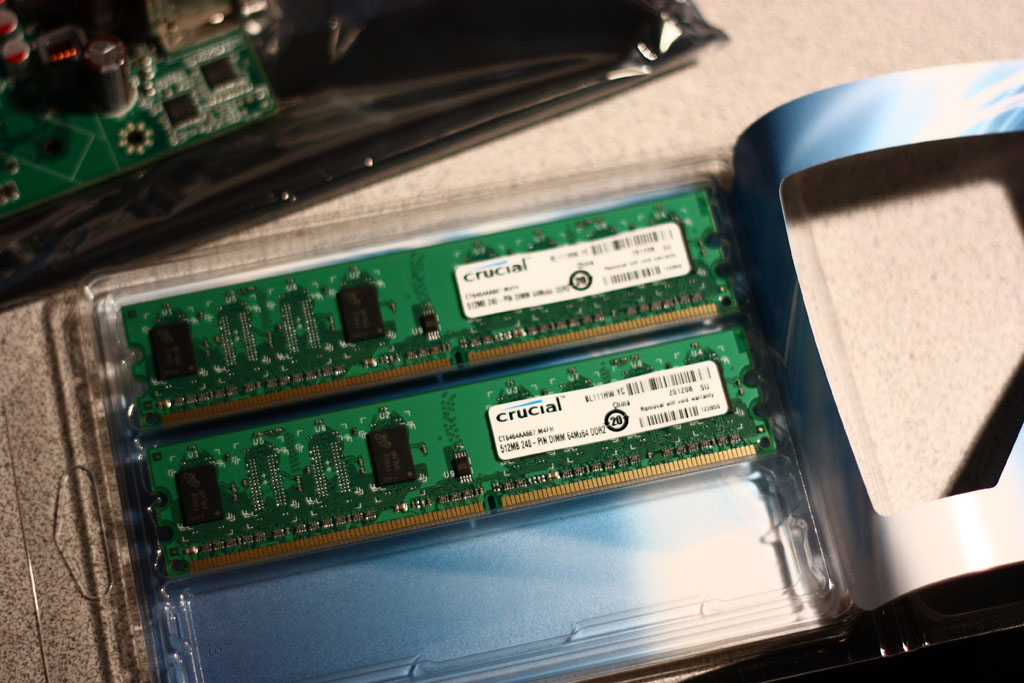
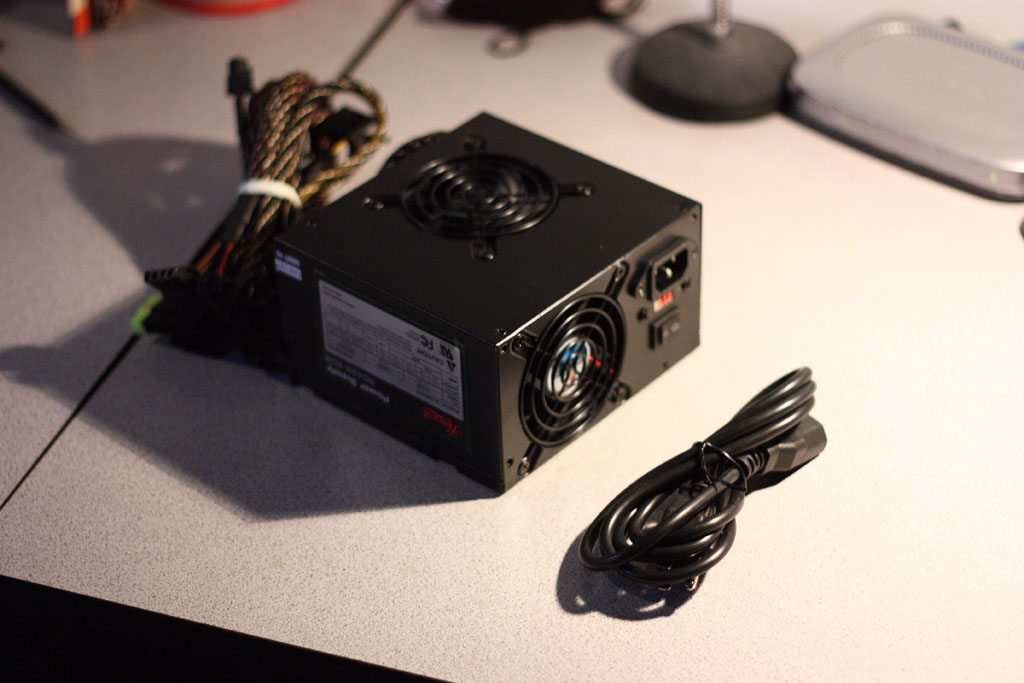
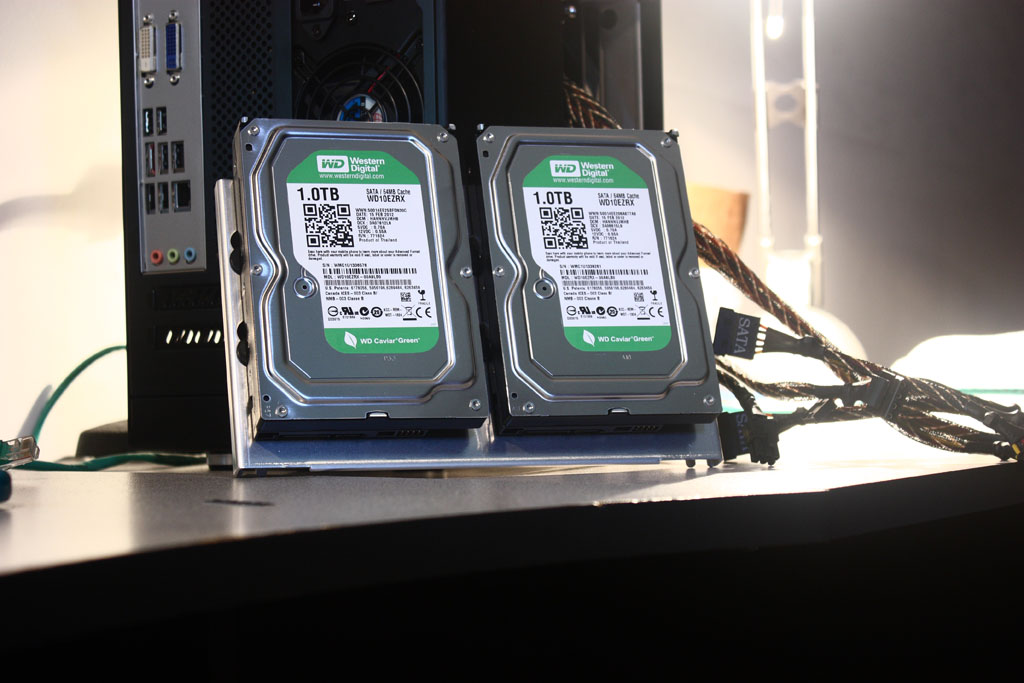
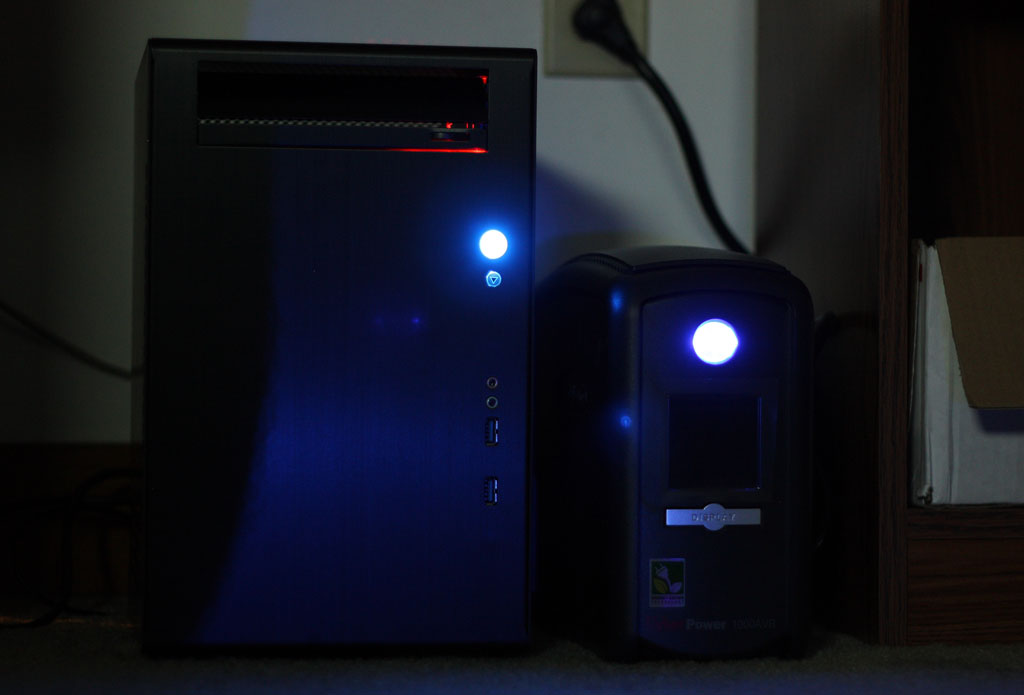
Part two of the series was devoted to hardware. I actually built a FreeNAS device for myself. And I listed all of the components I selected for use in my own machine and touched upon some of the reasons I chose them.
And now we’ve made it to part three, the final installment of the series. Here we’re finally going to dig in to the meat and potatoes of this project – FreeNAS itself. I’m going to tell you where to get it, how to install it, and what you need to do to make it work. This is where things start to get fun.
FreeNAS First Steps
The obvious first step here is obtaining FreeNAS. As the name suggests, FreeNAS is free. You just need to download and install it. If you visit www.freenas.org, you’ll see download links on the right-hand side of the page. There are a number of options available to you, including 64-bit versions, 32-bit versions, upgrades, plugins, etc. For new installs, you can safely ignore everything other than the 64-bit or 32-bit downloads.
The choice of 64-bit vs. 32-bit really comes down to hardware compatibility. If you intend to use over 4 GB of RAM and all of your hardware has 64-bit driver support under FreeBSD, you’ll want to download the 64-bit version of FreeNAS. Otherwise, you’ll want to opt for the 32-bit version. Note, however, that if you do use the 32-bit version, the OS won’t be able to use more than 4 GB of RAM. This isn’t a FreeNAS limitation. It’s a 32-bit OS limitation. Other operating systems suffer from it too.
Once you’ve decided on the bit-ness of your OS, you’ll want to decide on how to install/run FreeNAS. The main page of the FreeNAS website only lists download links for ISOs. But there’s another option – the compressed disk image.
An ISO image is just a CD-ROM image, which in this case just so happens to be bootable. If you intend to install FreeNAS to a hard drive, this is what you’ll want to use. Just use your favorite CD burning software to burn it as an image and not a file. After you burn the CD and boot from it, you’ll be walked through the FreeNAS installation process. The process is fairly straightforward. It really just amounts to selecting which drive or partition you want to install the software to.
The IMG file, which is what I opted for, is a disk image of the operating system that you essentially “blast” onto a drive. It’s built for users who want to run the OS from a USB stick or a CF device. But why would you want to do such a thing? I did it to make my RAID configuration simpler.
If you want to use a software RAID, then you must install FreeNAS into a non-RAIDed drive. This means you’ll need separate storage for both your OS and RAID. Think about that for a minute. If you want to use FreeNAS’s RAID support, FreeNAS needs to be able to start up. But it can’t start up if it’s on a RAIDed drive. It’s the classic chicken vs. egg problem.
The flipside of that is if you choose to use a hardware RAID, you can install the OS wherever you want. But you’ll sacrifice available public storage since the OS will be included as part of the RAID. It’s a tradeoff.
To obtain the compressed disk image, you’ll need to visit the FreeNAS SourceForge site (http://sourceforge.net/projects/freenas/) and browse through their files until you find what you want. The compressed image files have the extension “img.gz”. When I built my machine, the latest version of FreeNAS was 8.0.4 P1, so the file I downloaded was FreeNAS-8.0.4-RELEASE-p1-x86.img.xz.
After you download the IMG file, you’ll need to write it to a USB key or a CF device. The recommended way to do this is by using a tool called Win32DiskImager (https://launchpad.net/win32-image-writer). The user interface for this application is fairly straightforward. But one word of caution: be mindful of the drive you’re selecting for writing. I’ve read a few stories of folks accidentally writing images to their PC boot drive and totally ruining their day. Double and triple check your target drive before hitting that “Write” button.
Booting It Up
The first time you boot FreeNAS the following boot menu will appear on your screen, but only briefly. If you wait a few seconds, FreeNAS will start booting up in its normal default mode.
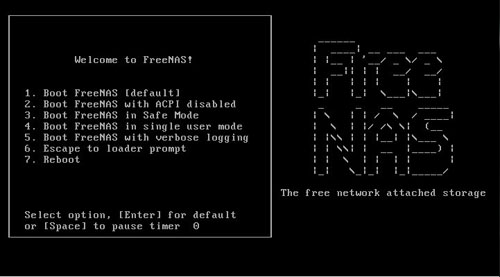
After the boot menu has its chance to vie for your attention, all sorts of stuff will start flowing down the screen. This is normal. But you may have to sit through this for a few minutes in order for FreeNAS to completely boot. A lot of stuff is happening here – hardware detection, system configuration, the starting of services, etc. Assuming no errors occur during the boot process, you’ll eventually be presented with a screen that looks like the following.
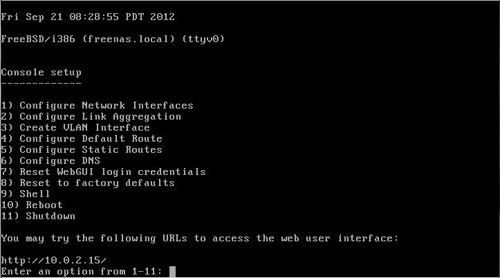
There are a couple of things worth noting in this screenshot. The first is that from here you have some basic control over network configuration, you can obtain a root shell if needed, and you can also reboot or shutdown the machine. However, you’ll notice that there’s no mechanism here for configuring RAID arrays, advanced network settings, services, user accounts, etc. Well, as it turns out, this isn’t the primary interface for managing your FreeNAS server. We’ll get to that in a moment, however.
Just above the “Enter an option…” line, you’ll notice a URL. If FreeNAS was able to acquire an IP address using DHCP, then this URL points to the FreeNAS machine. This URL allows you to access the FreeNAS device from a web browser on another machine. What you’ll see in your browser is what I like to think of as the “business-end” of FreeNAS. This is where the real configuration happens.
Note that because of differences in network configuration, your URL will most certainly be different than the one shown above.
FreeNAS Configuration
When you first point your web browser to your FreeNAS machine, you’ll see something that looks like the following.

Down the left hand side of the page are categories of options. The main area to the right displays the settings for the currently selected configuration options. And near the top is a toolbar-like interface for quick access to commonly used option pages as well as things like “Help” or “Alerts”.
Notice the state of the “Alerts” button. When all is well with your system, this button is green. But if something bad happens, or if something needs your attention, the button will turn red as shown in the screen shot. In this instance if we click on this button, we learn that no admin password has been set for the machine. Whoops! We can remedy this by clicking on the “Account” button, selecting the “Change Password” tab, and setting a password for the admin user. Once you do this, the button should turn green.
From here, I’m only going to cover the configurations applicable to my own FreeNAS project. FreeNAS has a lot of excellent documentation and there have been entire books written on the platform. So instead of going down the proverbial rabbit hole, I’m going to show you what my setup looks like. Don’t let my approach be the last word. Read the FreeNAS documentation. If you have a needs different from my own, that’s where you’ll learn how to make FreeNAS cater to them.
Network
Once you change the admin password, the next thing you’ll want to do is visit your network settings. By default, FreeNAS uses DHCP to acquire an IP address, DNS info, gateway info, etc. And since you probably don’t want the IP address of your server changing all the time, you need to set it to something more stable.
Beneath the “Network” category on the left, you’ll see a subcategory entitled “Interfaces”. A fresh install will have no interfaces listed here. This might seem odd because FreeNAS obviously knows there’s a network interface. After all, you’re connected to the machine over HTTP from another machine. But, alas, you’re going to need to explicitly add the network interface here in order to configure it.

Just as a side note, most DHCP servers (consumer grade routers fall into this category) have the ability to designate a particular IP address for a particular MAC address and/or mark an IP address as being unassignable to machines using DHCP. You’d be wise to add your FreeBSD machine’s IP address to the list so the DHCP server doesn’t try to assign it to another machine. Otherwise, you might start noticing weird network behavior.
Storage

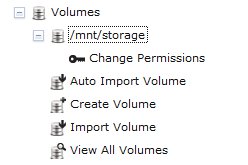
If you expand the “Storage” category and the “Volumes” subcategory beneath that, you’ll see a number of options for managing your storage. Since this is a fresh install of FreeNAS, there won’t be any volumes listed. So we’ll need to create a new one. Click on “Create Volume” and a popup will appear that gives us a number of options for creating a storage volume.

The pop up allows us to name the volume, select which hard disks are participating, pick a file system type, and, if you’ve selected multiple hard disks, what type of RAID to use. The storage name can be anything.
In our example system, I’ve given our volume the uninspired name, “storage”. I have two hard disks that are 53.7 GB each. I selected them both and opted for a mirror configuration, which is equivalent to RAID1. I also selected UFS as the file system.
A word about file systems. UFS (Unix File System) is the default file system on FreeNAS. It’s a slower performer than ZFS. But it works well on machines with limited resources. ZFS is a high performance file system, but it requires a lot of resources to use. The FreeNAS documentation describes the pros and cons of using one vs. the other. But the gist of it is if you’re not using a 64-bit machine and you’ve not much RAM to work with, forget about using ZFS.
Once you click on OK, the volume will be created and you’ll see it appear under the “Volumes” category. This doesn’t automatically make it available to other computers, though. We’ve got a little bit more work to do. Specifically, we need to enable and configure the appropriate network file system service.
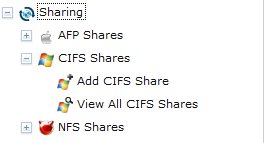
For my purposes, I need the storage to be available to an assortment of devices – Windows, OSX, Ubuntu, and Android devices. This means using a network file protocol all of them can understand. And with Windows machines in the mix, the choice is simple – CIFS (formerly SMB). CIFS is the Windows share protocol. And it still being a Microsoft world, most other operating systems offer CIFS support. OSX supports CIFS out of the box, just about all Linux distros know how to mount a CIFS share, and Android devices can connect to CIFS shares with the appropriate app (e.g. ES File Explorer). So CIFS it is.
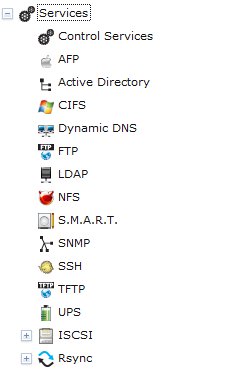
CIFS isn’t on by default. So it’ll need to be configured and enabled. Beneath the “Services” category you’ll see the “CIFS” subcategory. Clicking on that will open the CIFS configuration dialog.
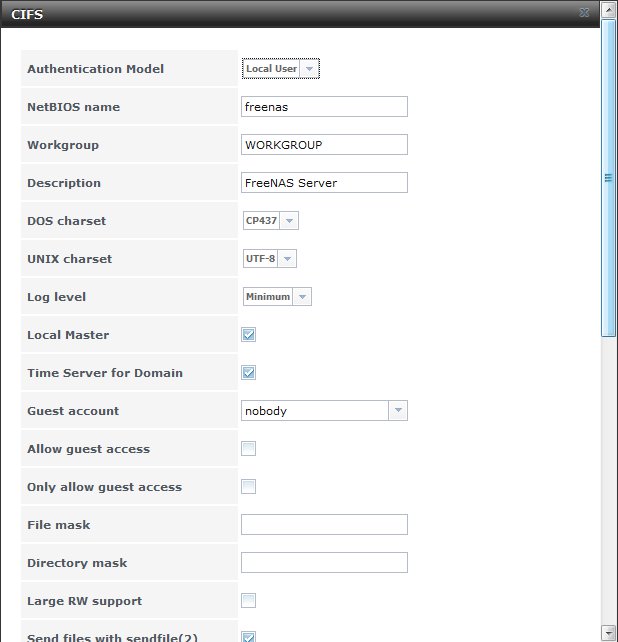
There are a lot of options, most of which you can ignore for the time being. The primary ones of interest for my purposes were “Authentication Model”, “NetBIOS Name”, “Workgroup”, “Allow Guest Access”.
“Authentication Model” allows you specify how you want clients to authenticate against the CIFS service. Selecting “Local User” forces the client to provide a username and password which corresponds to a user account on the FreeNAS device. By selecting “Anonymous”, you’re telling FreeNAS not to force users to provide credentials. Because I want all machines in our home to access the server without having to provide credentials, I set “Authentication Model” to “Anonymous”.
“NetBIOS Name” is how your FreeNAS device will appear to Windows machines on your local network. It’s also the name you can use as shorthand when trying to access your FreeNAS device. So instead of having to type in something like “\\192.168.0.50\storage” on a Windows machine, you can use something a bit more user-friendly like “\\freenas\storage”.
“Workgroup” should match whatever Workgroup your Windows machines belong to. If this isn’t set correctly, you won’t be able to browse to your FreeNAS device from a Windows computer.
“Allow Guest Access” allows whatever user ID you’ve associated with “guest” access to use the storage without having to authenticate.
Once CIFS is configured, the service needs to be turned on. To turn it on, all you need to do is click on the “Control Services” subcategory under the “Services” category. In “Control Services”, you’ll see a list of all of the services supports by FreeNAS. They’re all off by default. Clicking the appropriate on/off button will turn the CIFS service on.
Next, the storage actually needs to be exposed as a CIFS Share. If you expand the “Sharing” category, you’ll see a number of subcategories including one for “CIFS Shares”. Expanding “CIFS Shares” exposes an option for adding a new CIFS share. Add a new share, give it a name, and point it to your volume. Most of the default values will be inherited from the CIFS configuration. Be sure to enable “Allow Guest Access”.
At this point, client machines should be able to access the share and read from it. But you’ll quickly notice that you can’t create or modify files. This is because the permissions aren’t set correctly and changing them is the final thing we need to do. Click on “Change Permissions” beneath your volume listing. From here, you can simply enable Read/Write/Execute on for everybody.
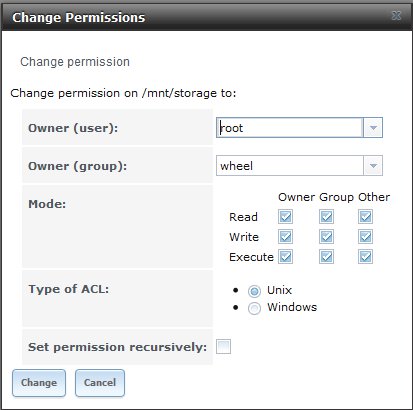
Click “OK” and restart CIFS just to be safe. Client machines should now have free reign of the storage space. Woohoo!
UPS
There’s one more service that I wanted to get working before I felt the device was complete – the UPS service.
FreeNAS has the ability to communicate with an assortment of power supplies over USB. It uses NUTS (Network UPS Tools) to do this. By configuring the UPS service, we tell FreeNAS what to do in the event of a power outage or low battery. If the power goes out, your FreeNAS device is able to power down itself in a clean and orderly way, giving your file system a fighting chance against corruption.
In my environment, which suffers from frequent, but brief power outages, I need FreeNAS to wait 10 seconds after a power outage occurs before deciding whether or not to shutdown. Power usually comes back on within a few seconds. But in the event it doesn’t after 10 seconds, I want the device to shutdown cleanly. It’ll be up to me to power it back on.
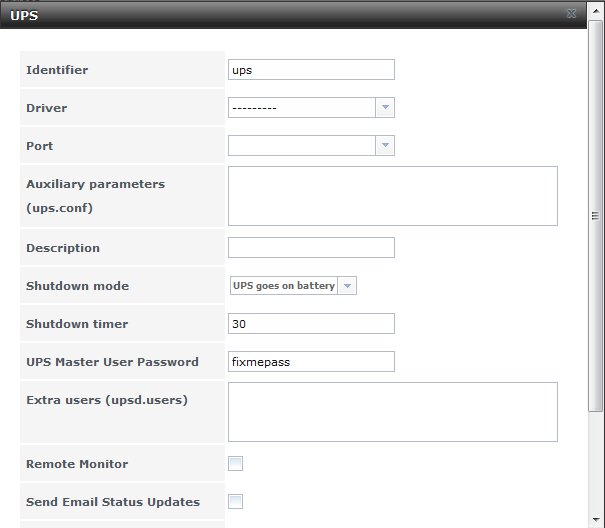
Open the UPS service configuration and choose the appropriate driver. If your UPS is listed, select it. If it’s not, all is not lost. Most of the drivers listed are generic and will work with multiple devices. It’ll just take some experimentation. Many of the choices listed are in fact the same driver. Don’t be surprised if you select one, save it, and come back later only to discover that a different option is selected. No harm done. FreeNAS doesn’t store your UPS selection, only your driver selection. So when you reenter the configuration page, FreeNAS autoselects the first device that uses the driver you had previously selected.
“Port” selection can be tricky. If you’ve only got one option to choose from, great. But if you’ve got more than one, you’ll need to figure out which port your UPS is on. The easiest way to do this, and the way suggested by the documentation, is to take a look at your console messages. To do this, click on the “System” category, click on the “Settings” subcategory, click on the “Advanced” tab, and turn on “Show console messages in the footer”. When this is enabled, you’ll see a terminal-like box appear at the bottom of the browser window. By unplugging and plugging in the UPS’s USB cable, you should see “/dev/ugenX.X” related messages appear in that window. If you see them, the port listed is the port you want to use for your UPS configuration.
For shutdown mode, you have two options – “UPS reaches low battery” and “UPS goes on battery”. They are what they sound like. If “UPS reaches low battery” is selected, your FreeNAS device will begin shutting down when the battery gets low. If “UPS goes on battery” is selected, FreeNAS will begin shutting down whenever power is lost. I selected “UPS goes on battery”.
The shutdown timer is specified in seconds and tells FreeNAS how much time should elapse between the shutdown condition being satisfied and the actual shutdown of FreeNAS. If the condition becomes unsatisfied during the time interval, FreeNAS was abort the shutdown. In my project, for example, I’ve set the shutdown timer to 10 seconds and the shutdown mode to “UPS goes on battery.” If the power goes out, FreeNAS will wait 10 seconds before shutting down. If the power comes back on before then, FreeNAS will abort the shutdown and continue on as if nothing ever happened.
|
IMPORTANT: One thing I’d like to point out is that the version of FreeNAS I installed has a bug that prevents the UPS service from working correctly. And the bug appears to have stayed around for at least 3 subsequent releases. You should test your configuration by simulating a power outage before trusting it to work correctly.
There exists a patch to the OS to fix the problem. But patching isn’t always straightforward. The problem in my particular version of FreeNAS was that the “uucp” user wasn’t a member of the “operator” group. And FreeNAS has a little database that “uucp” needs to read from, but can’t because it’s only accessible to root and the operator group. /data/freenas-v1.db You can do one of two things – make “uucp” a member of the “operator” group through the web configuration tool (for some reason, doing it through the shell doesn’t allow the changes to survive a reboot) or chmod the database, which is what I did. It’s not pretty and it’s wrought with security implications. But it is what it is. chmod 666 /data/freenas-v1.db |
End of the Road
And that’s it! If everything went ok, you should be able to access the FreeNAS storage like any other Windows share. If the Workgroup was set correctly in your CIFS configuration, you’ll be able to see the FreeNAS device from Windows machines just by browsing your network. Accessing the storage from other devices might require a bit more work. On OSX, I often have to use Finder->Connect To Server and specify the server using smb://ipaddress/storagename. On Ubuntu, I mount the storage as needed.
It might seem anticlimactic in the end. After all, we’re just talking about the ability to read and write files. In truth, a FreeNAS device is a dedicated file server capable of providing a multitude of services for you. There are a lot of possibilities. For instance, we’ve already discussed using a FreeNAS device as a dedicated backup server. I’ve also toyed with the idea of using it as a repository for video/images captured using IP security cameras. Basically, wherever you need shared or always-on storage, FreeNAS is a very capable solution.
BONUS: Automated Backups
My primary motivation for building a FreeNAS device was for performing automated backups. I’m going to leave you with a short how-to on how I made this work for our Windows PCs.
The first thing I did was to create a folder on FreeNAS for backups to be placed in. Being the creative type, I called it “backups”. Next I went to each Windows machine and configured them like so.
- I first installed a copy of RoboCopy and made sure its location was in the PATH environment variable. RoboCopy is a neat little command line utility that’s been bundled as part of the Windows Resource Kit since NT 4.0. It has a lot of neat features, the most important for me being its ability to perform folder mirroring. You can download the Windows Resource Kit free from Microsoft.
- I then created a one-line batch file that invoked RoboCopy.
robocopy c:\User\Shane \\192.168.56.101\backups\Shanes_PC /MIR /R:3
What this does is mirror my Windows account folder on the local machine to a folder on the FreeNAS device called “backups\Shanes_PC”. Note that the destination folder is different for each machine that’s performing backups.
The /MIR option says “mirror”. If a file is created or changed locally, it’s copied to the FreeNAS device. If a file is deleted locally, the file is deleted from the FreeNAS device. That last point is important to note. If you accidentally deleted a file 3 days ago and this script executes daily, that file is gone.
The /R:3 option means “retry 3 times”. If the FreeNAS device is unavailable, I don’t want the script to keep trying forever.
- I then configured the batch file to execute every time the user log’s off. You can do this by using the Group Policy Editor snap-in. Click Start->Run and type “gpedit.msc” and hit enter. Beneath “User Configuration->Windows Settings”, you’ll see an item labeled “Scripts (Logon/Logoff)”. Click on that and add the batch file path to the “Logoff” option.
You might be tempted to instead to use Window’s “Shutdown” script configuration option. I too started down this road. The problem is the network connections are closed before these scripts execute and you won’t actually be able to connect to your FreeNAS device.
That’s all there is to it. Whenever I logoff or shutdown, the batch file gets executed, and everything in my account folder gets synced to the FreeNAS machine. This includes “My Documents”, “My Music”, “My Pictures”, the desktop, etc.
Anyway, I hope this gives you some ideas on how you might create your own automated backup solution. For more information, visit FreeNAS.org. Good luck!